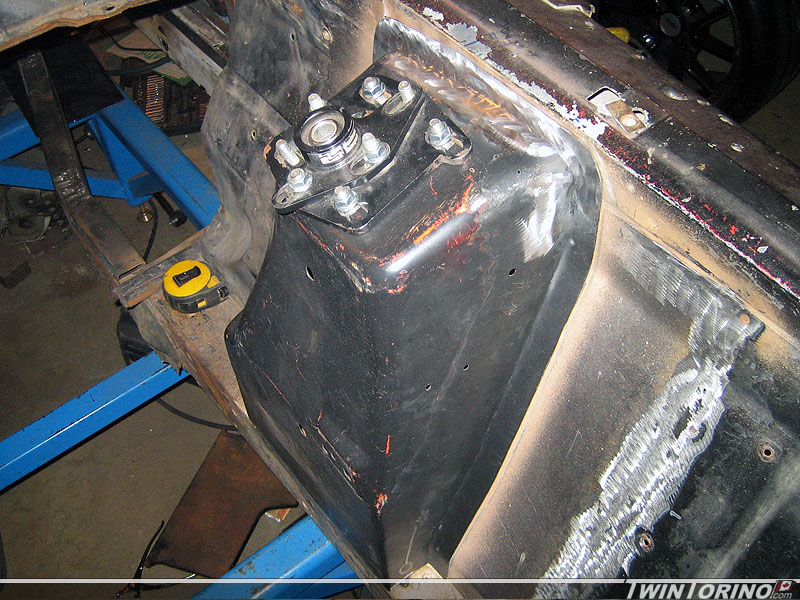
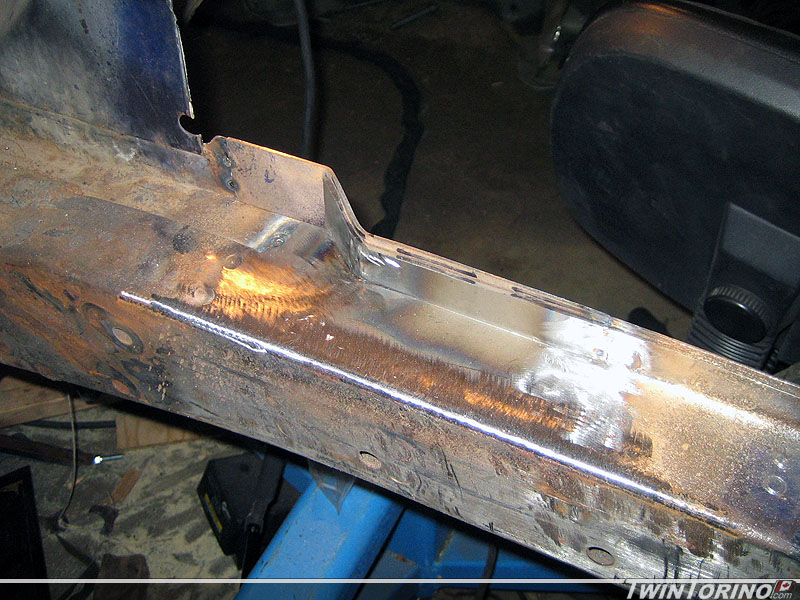
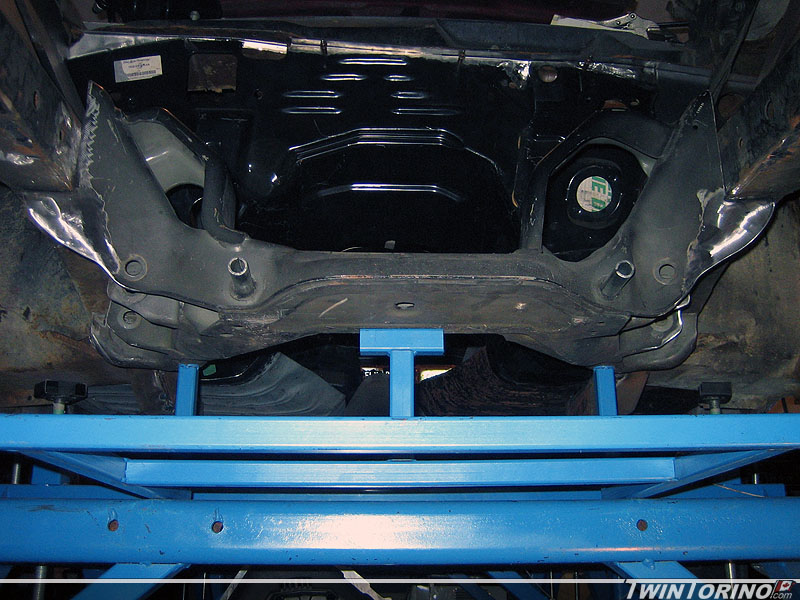
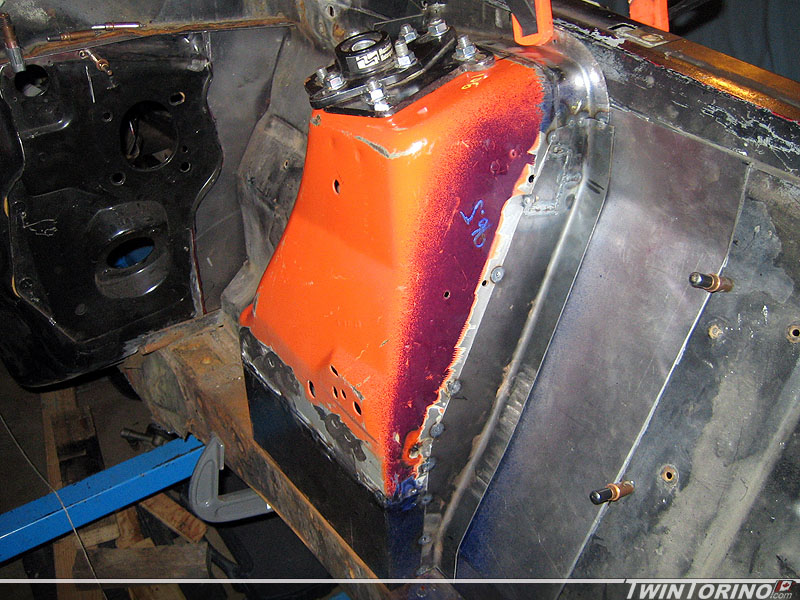
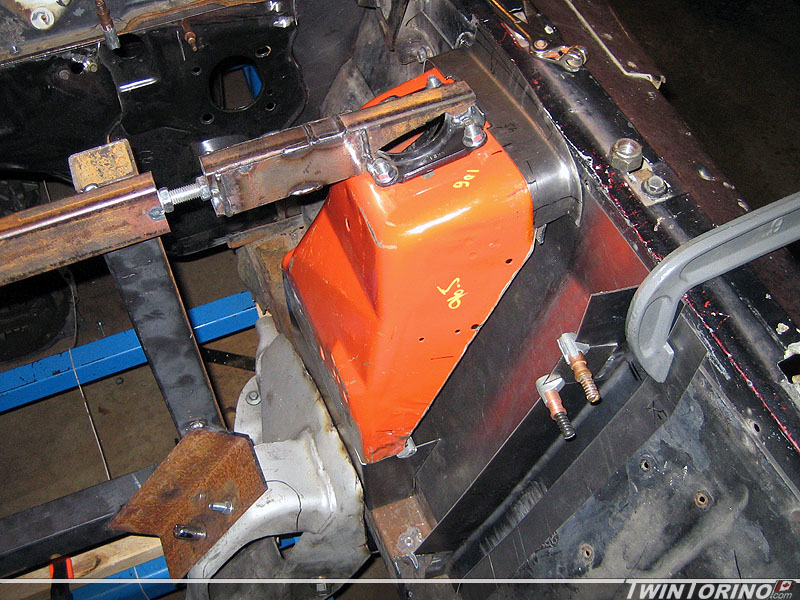
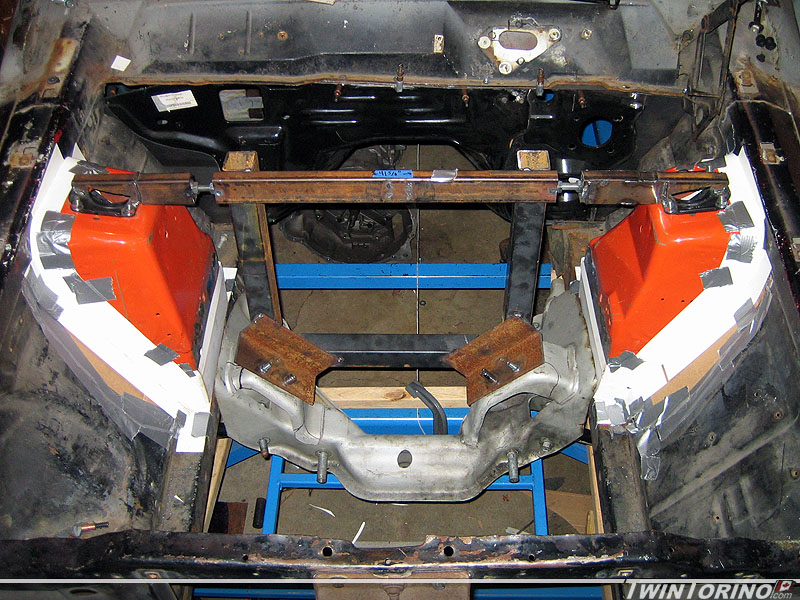
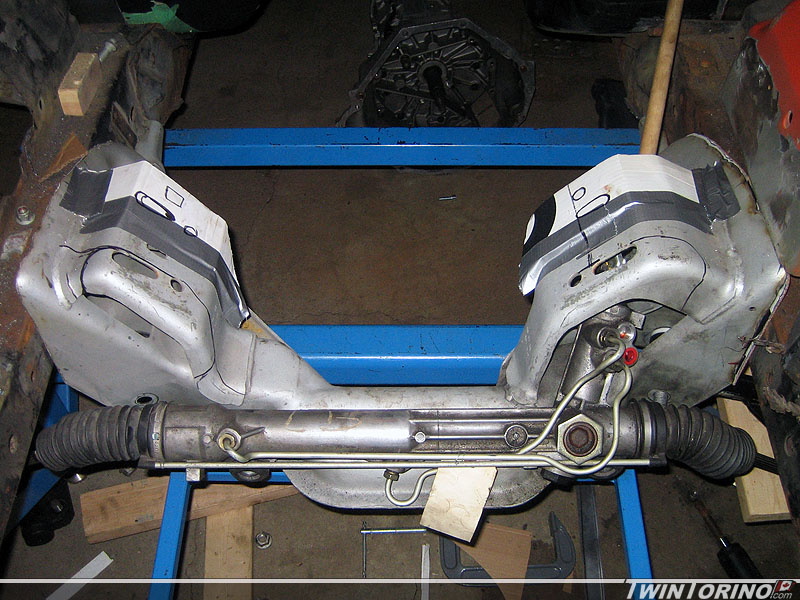
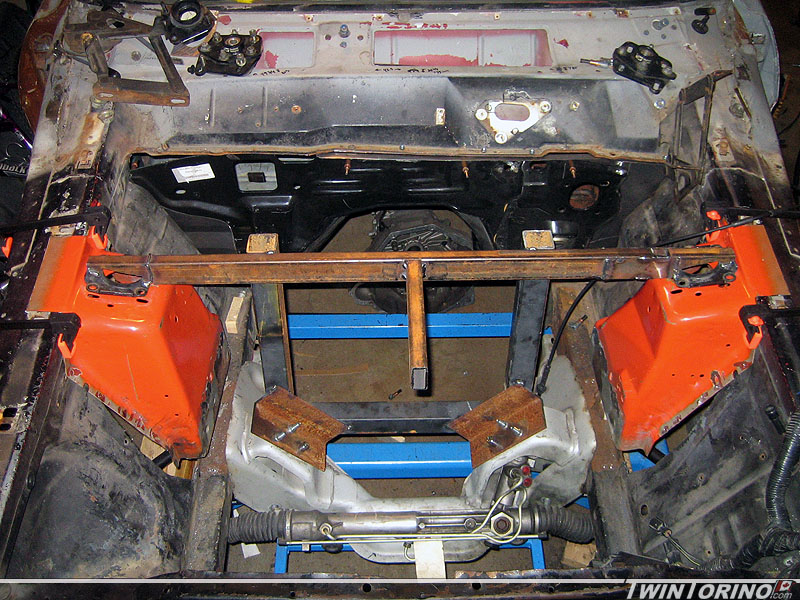
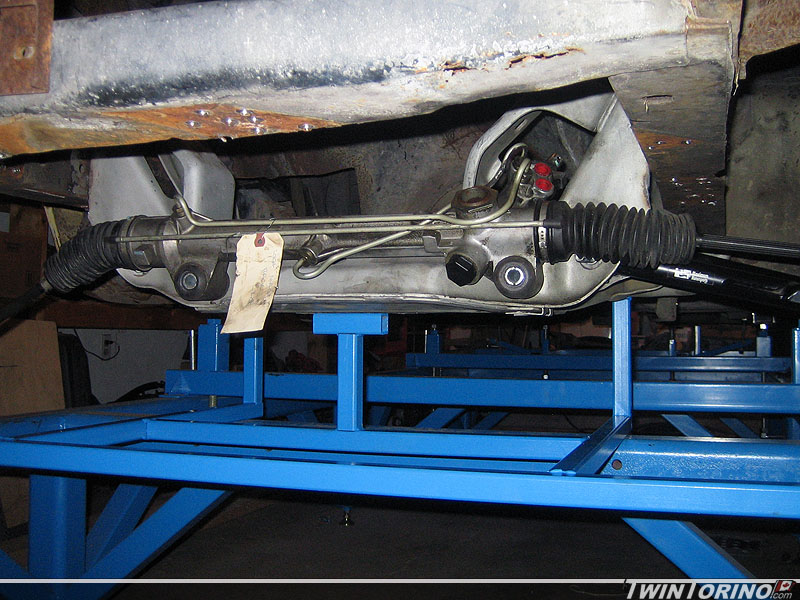
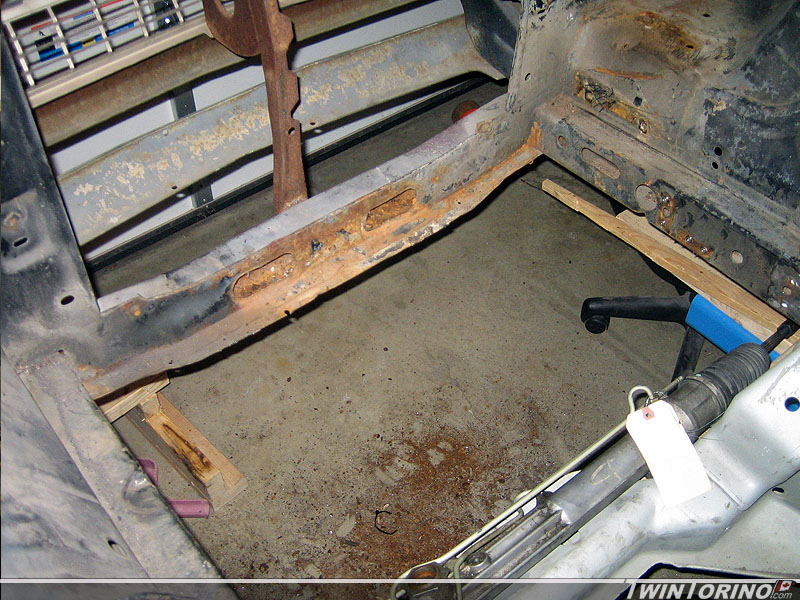
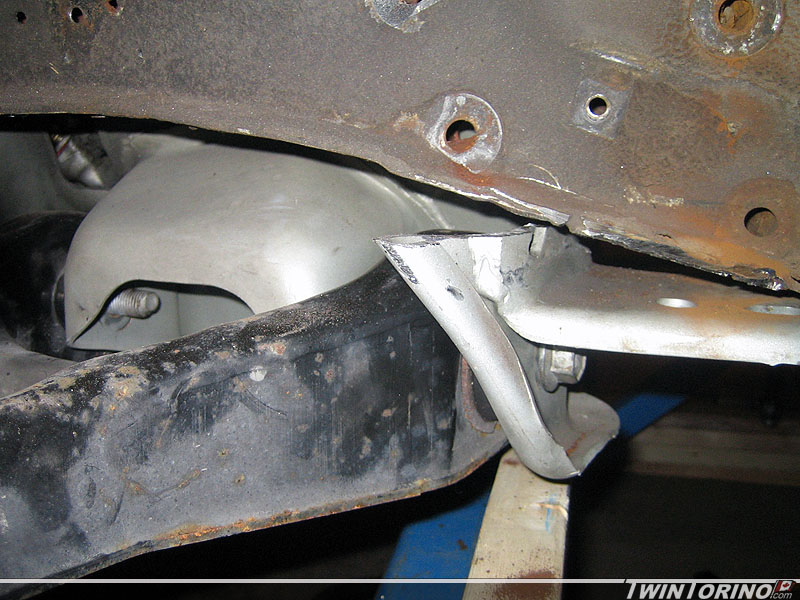
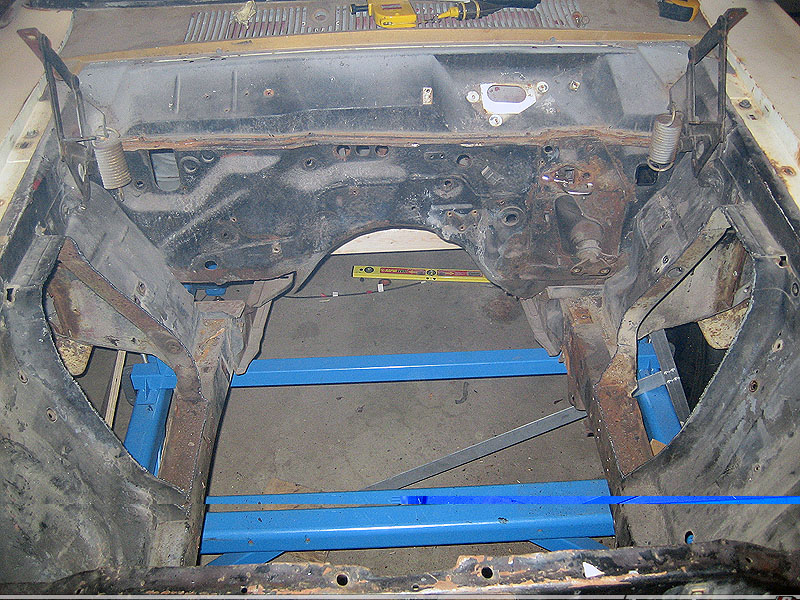
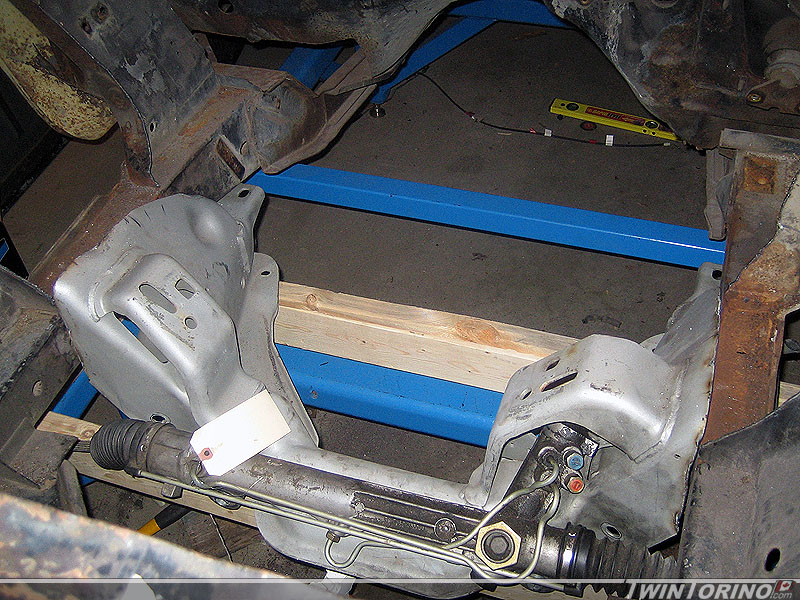
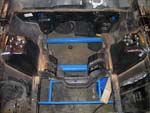
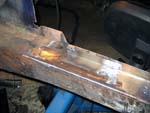
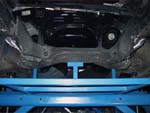
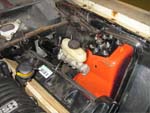
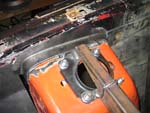
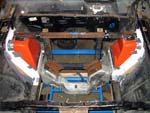
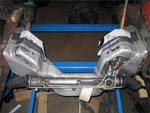
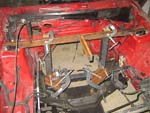
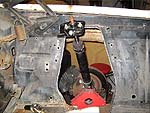
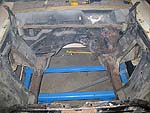
3/24/10: Front k-member is now welded in and the strut towers have both been finished off. We verified the caster and camber settings, and once we established they were correct, it was welded in for good. Front suspension is now ready to go on the ground! Just have to weld up some of the seams once on the rotisserie and it will be a done deal on the front. As soon as the car hits the ground - the motor is ready to go in. Just have to figure out how far back it can sit and then can drill the new holes in the offset motor mount brackets.
Sway bar is the only thing left. Will be using a straight hollow splined bar from Speedway Engineering with offset sway bar arms. Will use a PVC pipe to package one in for now until the bar rates are selected. To select those, final springs rates need to be selected, which is waiting on the overall corner weights of the car. Won't have those for a while.
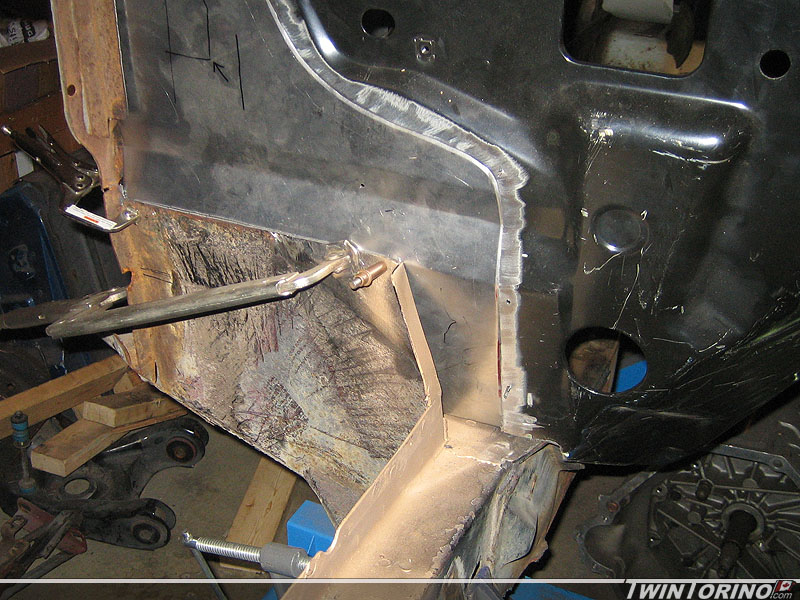
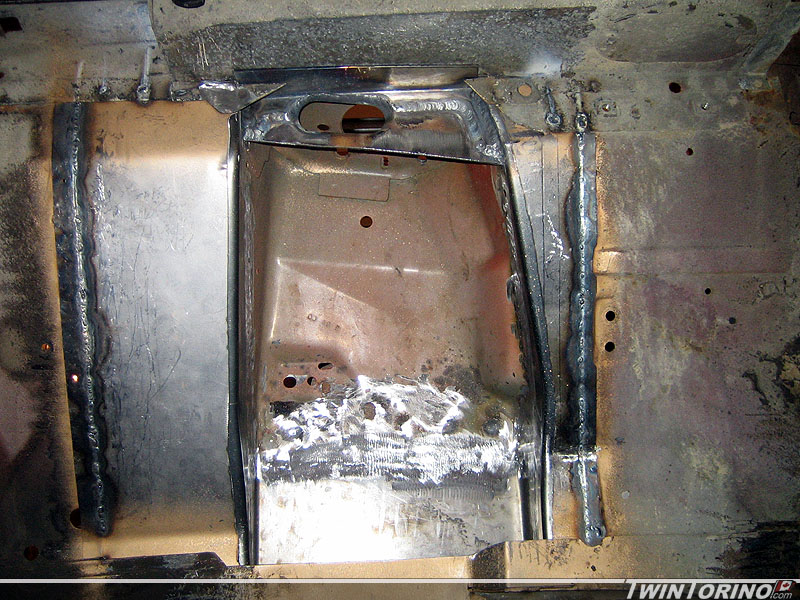
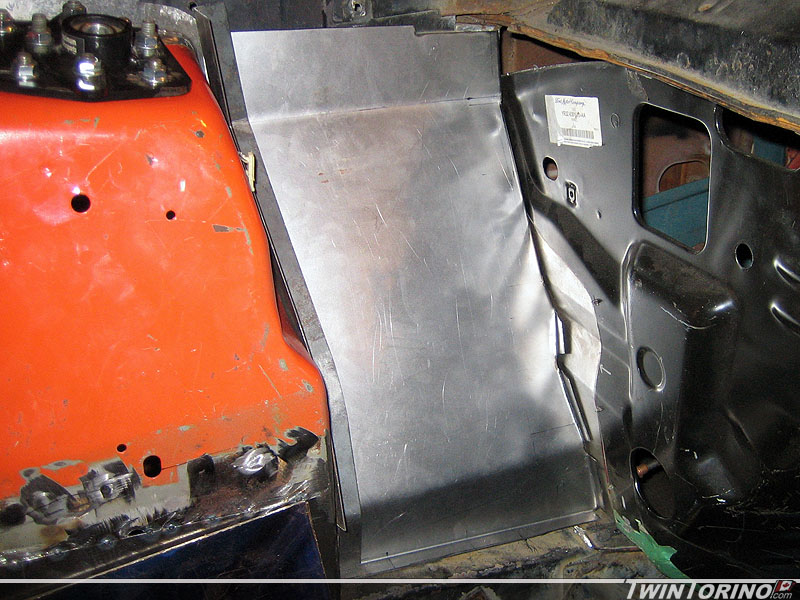
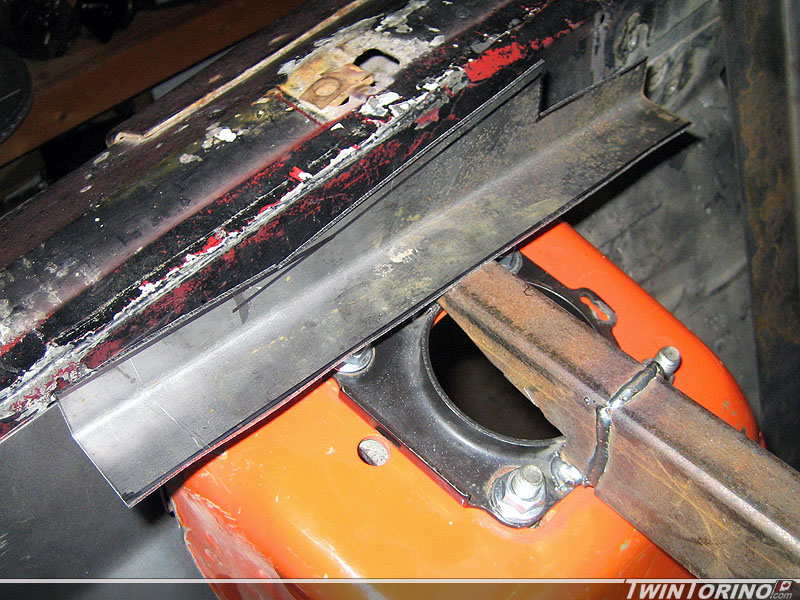
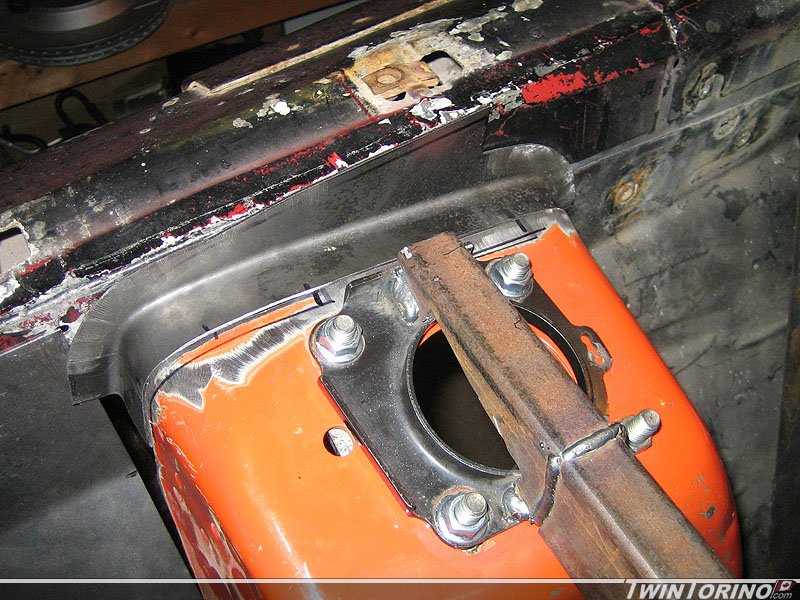
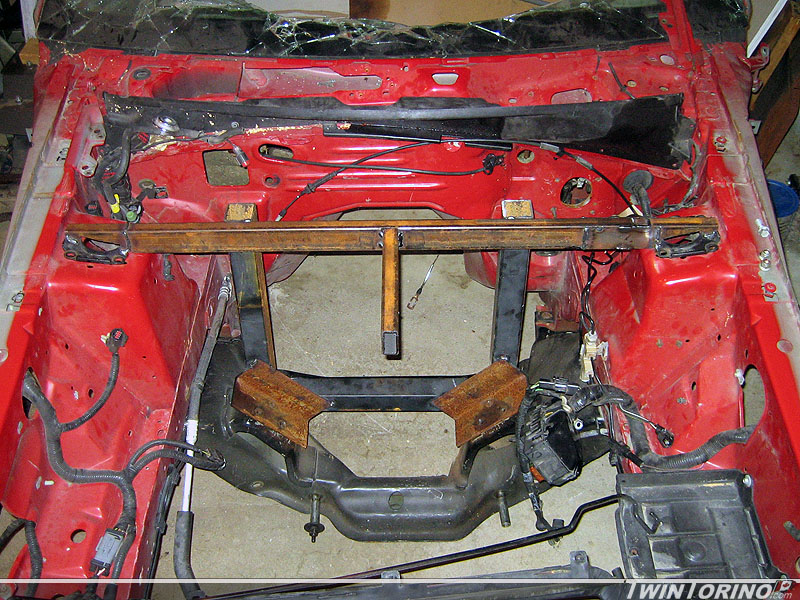
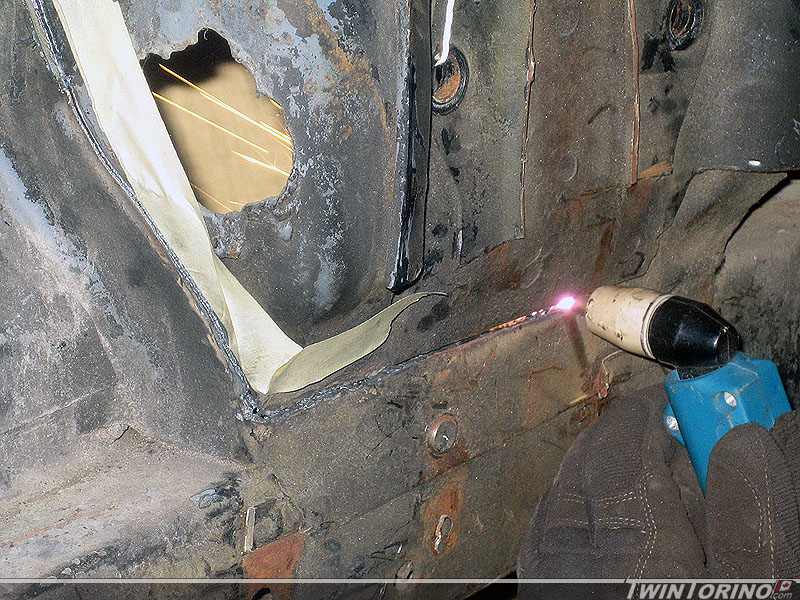
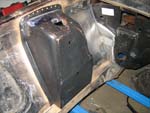
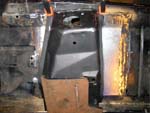
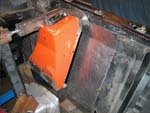
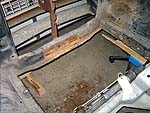
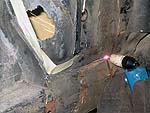
3/14/10: Made some more progress on the front suspension/firewall. Pass side firewall is now near completion and mates up nicely with the torque boxes (easier said that done). After that, the rear closeout was welded in for good, and then the strut tower was tacked in too. Will finish welding up the tower and then weld in the k-member this week. After that - front suspension is basically done except for the swaybar setup which should be fairly easy anyway. It will be based off a Mustang one.
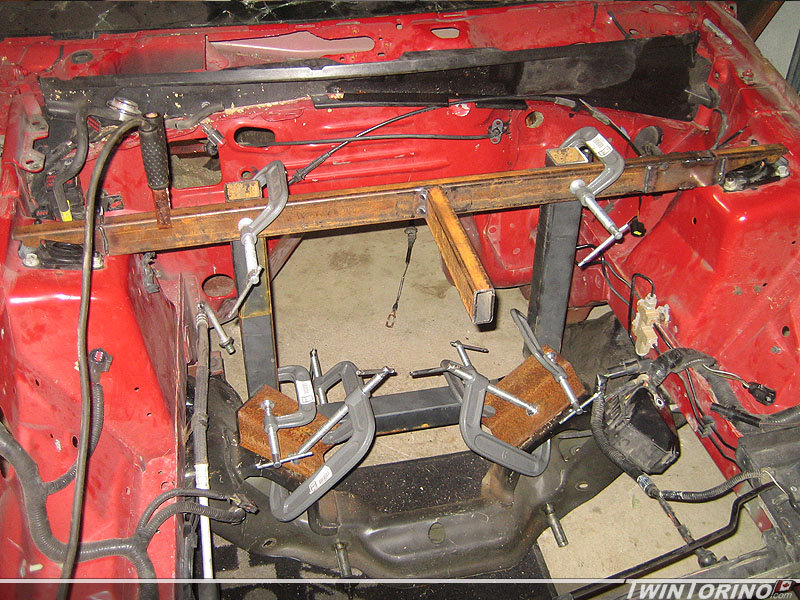
3/6/10: Finally stuff on the front suspension is going in for good. Final prepped everything on the drivers side strut tower, drilled all kinds of holes for plug welds and welded everything in. We will wait until we get the car on a rotisserie to well all the way from top to bottom. With the plug welds ground down, it looks like the pieces were supposed to be there. Just need to weld in the pass side and it will be time to put the k-member in for good. Almost done with the front - hard to believe.
 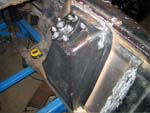
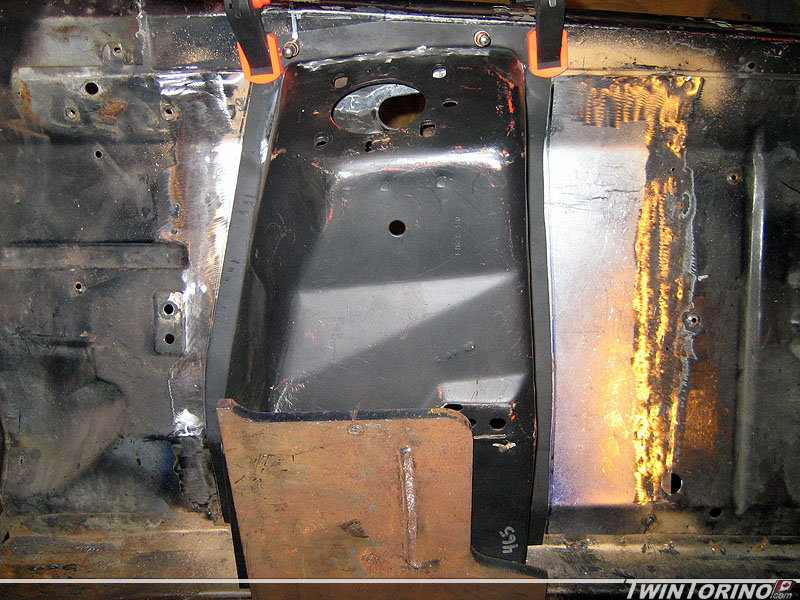
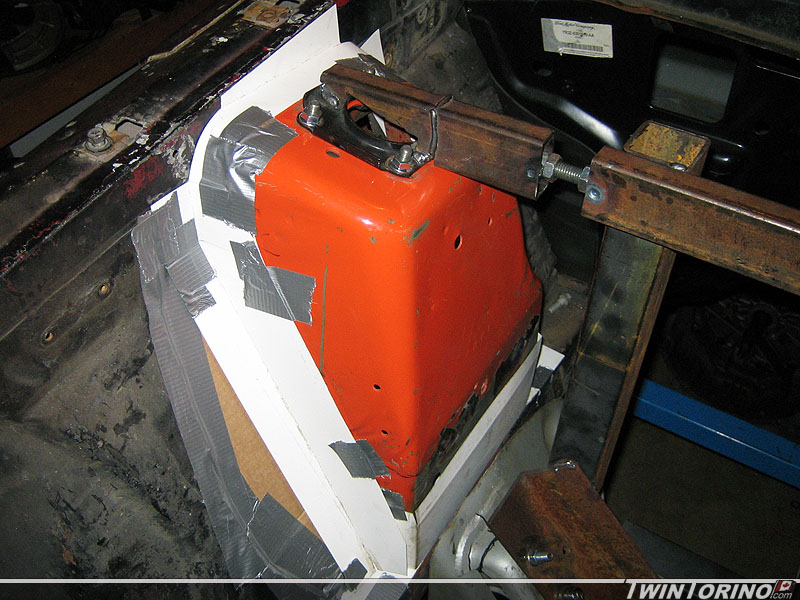
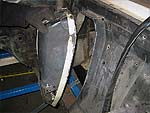
2/23/10: Started pulling everything apart before the re-welding begins. This one definitely screamed Kodak moment. This is a close to a skeleton as it will go - will be a nice picture to look back on. The car sure looks awful like this. Everything from now on will be an uphill battle and the car will start to look better by the day. Finally have the drivers side strut tower completed and ready to weld in. Got the stiffener plate welded on and have all the close-out panels welded in and ready to go. Hope to finish the pass side one this week and get them welded in for good. Only a year behind schedule on these.
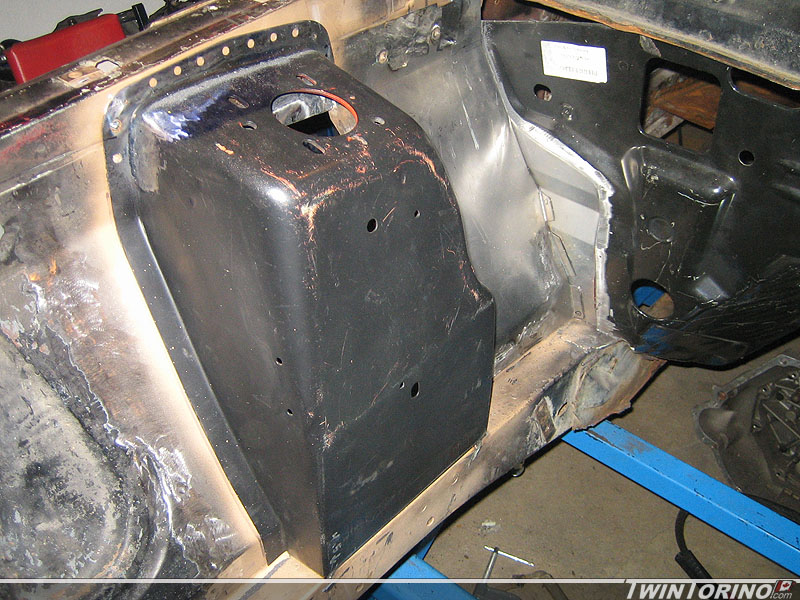
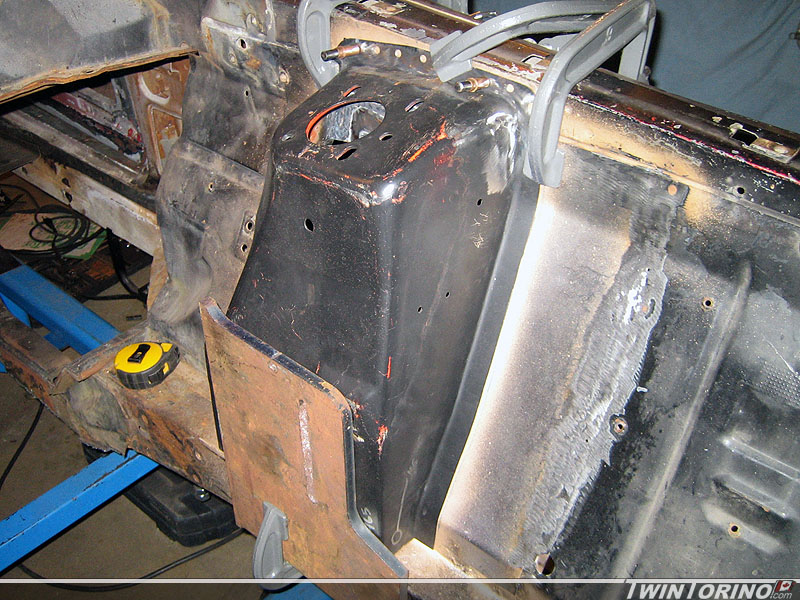
2/15/10: Got the motor mount extensions tacked in and ready to go. Likely won't go much further with these or drill motor mount holes until the actual engine goes in and we can check clearances. That way it can go back as far as possible. To do that we will just cut the studs off an old set of motor mounts which will allow the motor to easily slide back. K member is now ready to weld in. Just need to finish up the strut towers are front suspension will be almost done.. finally!.
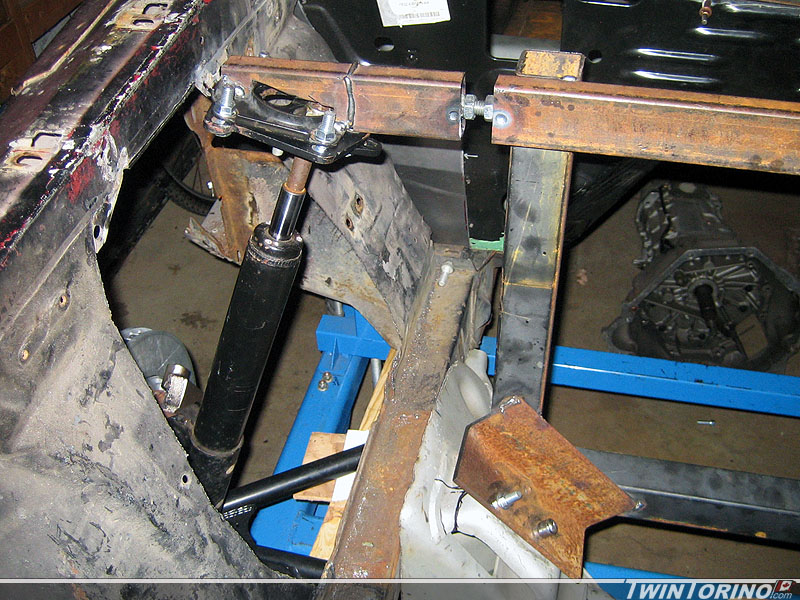
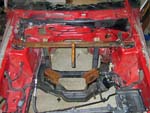
Started working on the strut tower stiffening braces. These will directly tie the strut towers to the upper "shotgun" pieces on the body. These tie into the reinforcements plates on the Mustang strut towers.
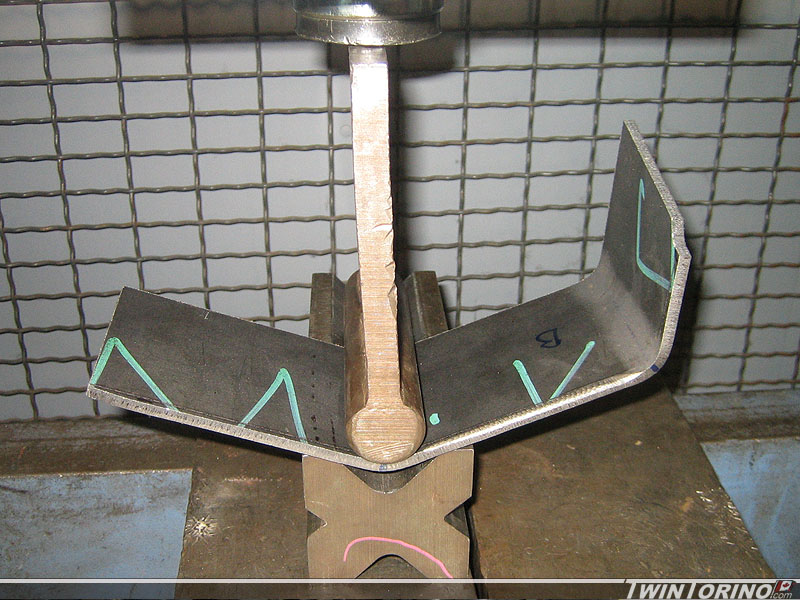
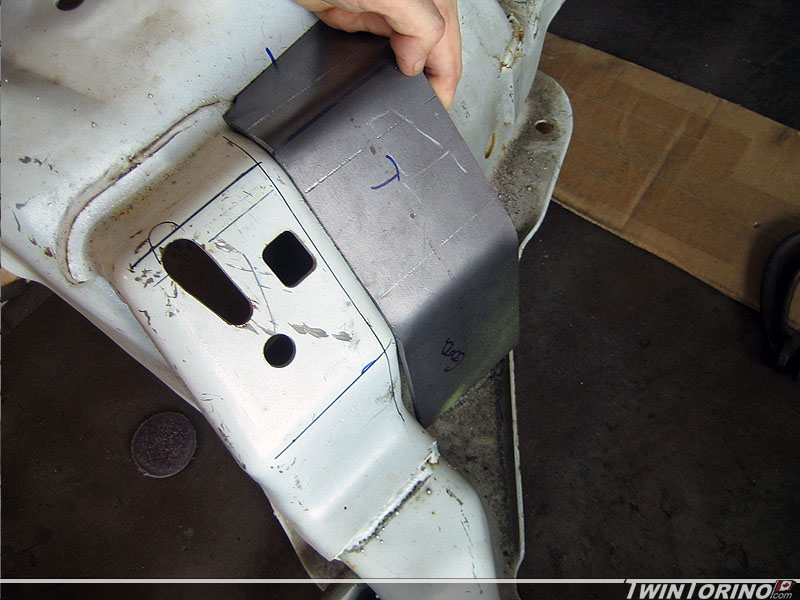
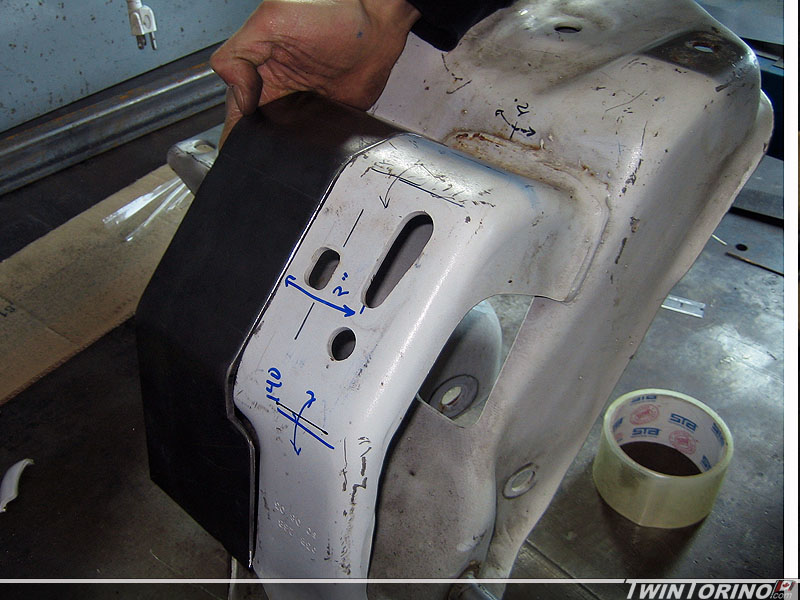
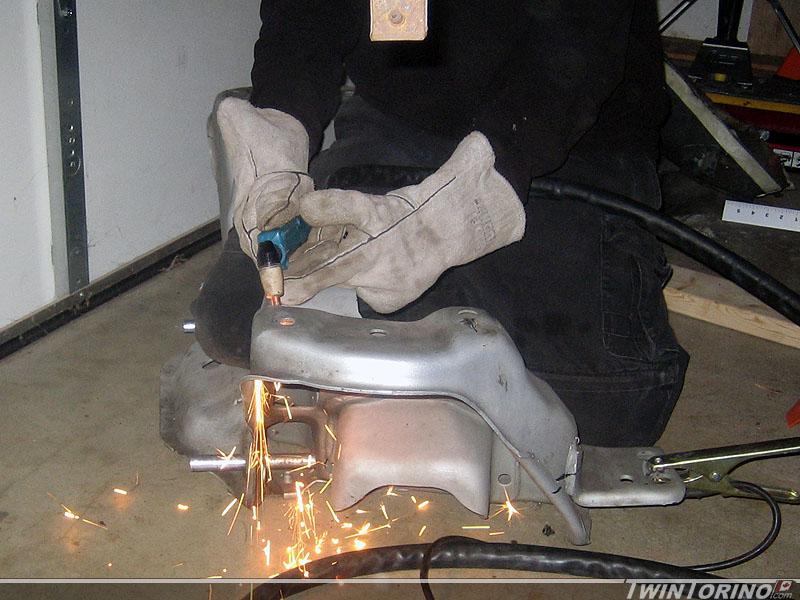
2/9/10: Moving right along - have the Mustang K-member mounting tabs completed. Only thing left to do it shift the engine mounts back 3" to get the engine as far back as possible. Since the steel on the stock mounts is 3/16" thick, this means the std brake won't cut it. Have to move the the hydraulic press for these bends. Got them ready to weld in over the weekend. Will get them welded in this week and then it is finally time to weld the front suspension permanently into the car.
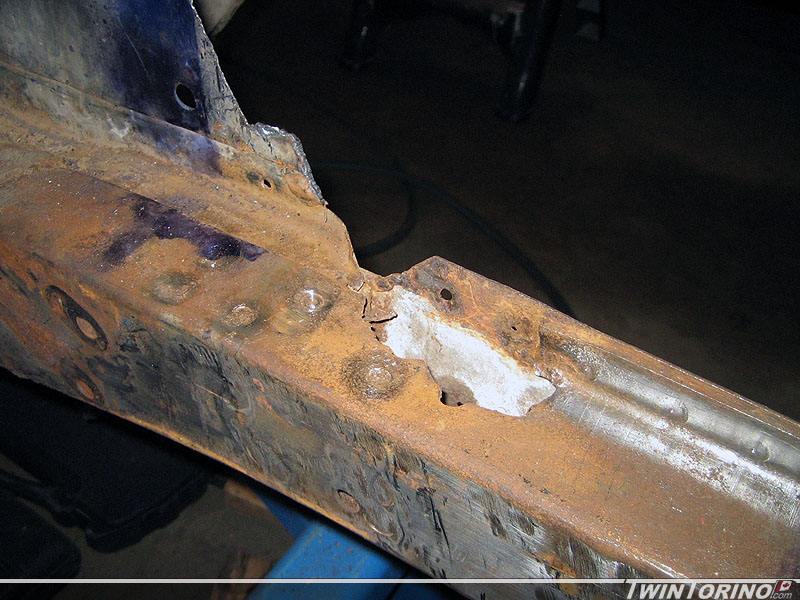
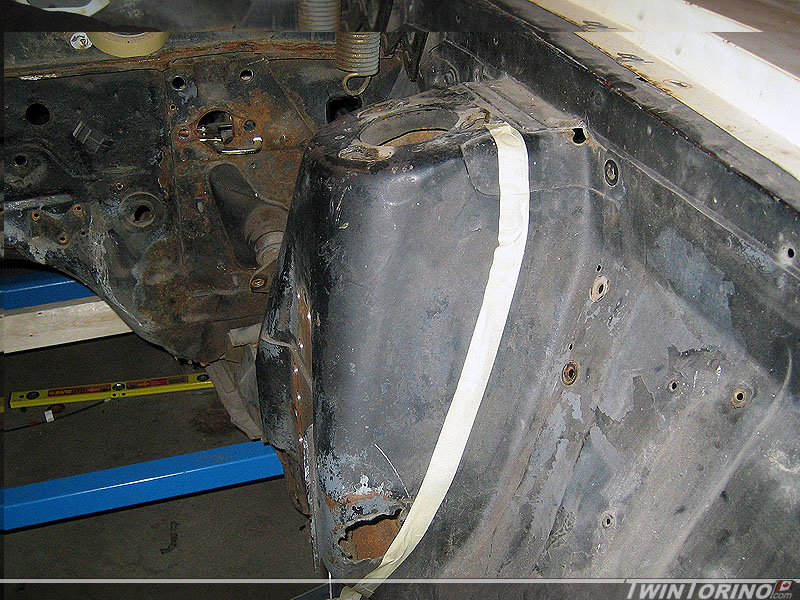
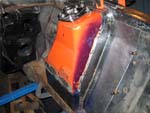
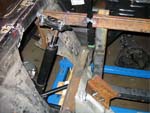
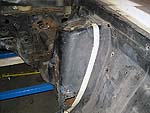
1/27/10: When we removed the shock towers the steel was flaking away a bit, but I thought it was nothing out of the oridinary. The more I picked away at it.. the bigger it got. Have to attack this before the towers go back in. Should last a couple more years now. This also brings up the question - how the heck do you get at this area if the stock towers are still in the car? Most people do not have the novelty we do by not having them in the way. Still have to fix the underside where the rest of the water went and rotted things away.
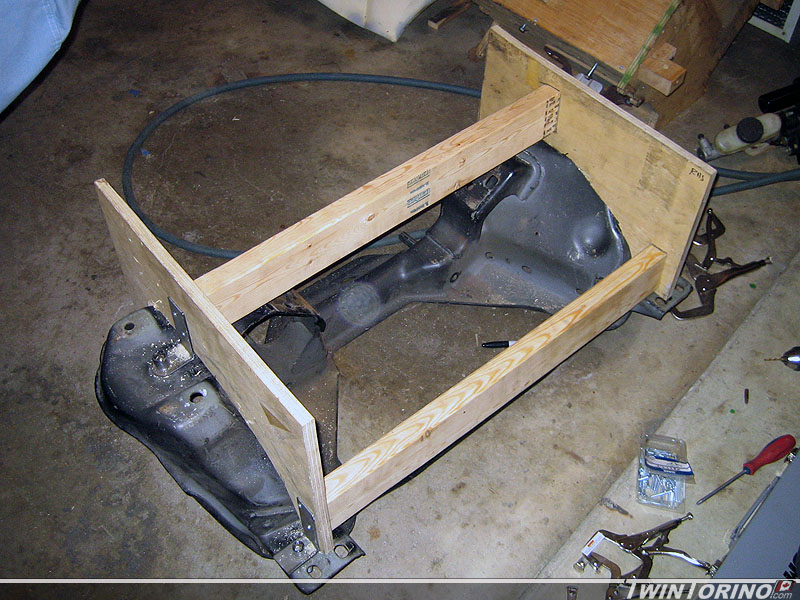
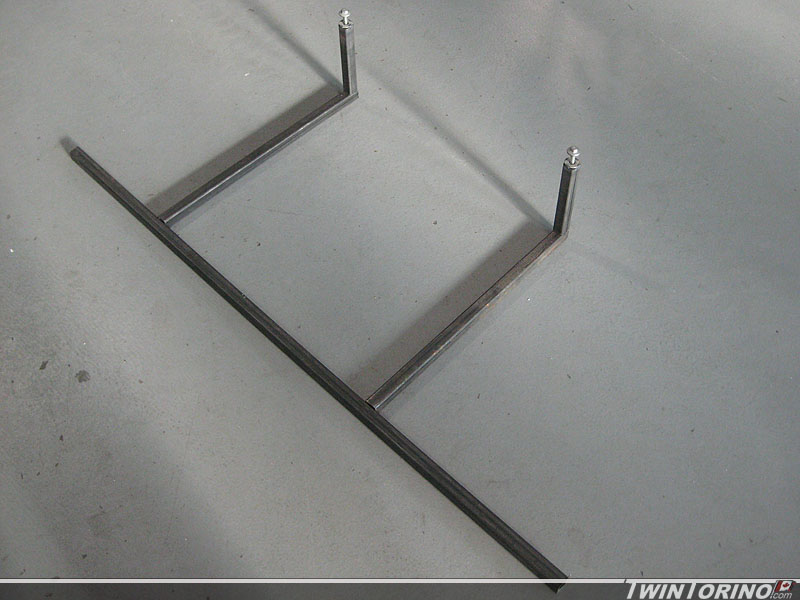
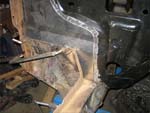
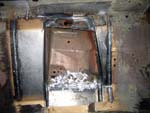
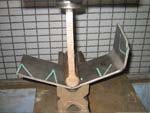
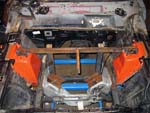
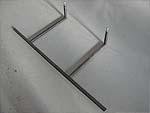
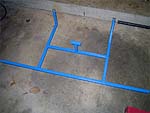
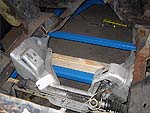
1/25/10: Moving right along on the front suspension. Pass side strut tower is done and ready to tack in. Next step was to make a perfectly centered and tight fitting k-member. The one we have been using to date is hacked up and really only for setting things up. Time to make another jig for this. As you can see, nothing too elaborate, but it serves it's purpose. We used reference holes on the part used at the assembly plant to locate the jig. Then we made up 2x4's that are the exact width between the frame rails. Finally two pieces of plywood are used to conform to the curves of the part. To use, the jig is placed on a Mustang K-member, sockets are placed in the 4 holes to located jig and then a utility knife blade is used to scribe lines on the parts. After that, we break out the plasma cutter and trim/grind to suit. Works like a charm! Making one for car #2 is now a breeze.
We used it to cut the k-member shown and it fits perfectly. That will make it very easy to weld in. Started on making up pieces to run under the frame rails to clean up the package and add a bit more stiffness. Kinda looks like the k-member was meant to be in there. Just need to make up the rear ones and the k-member will be ready to go in. Only thing left now is to weld in the filler panels and modify the motor mounts. After that, the front suspension is done!!
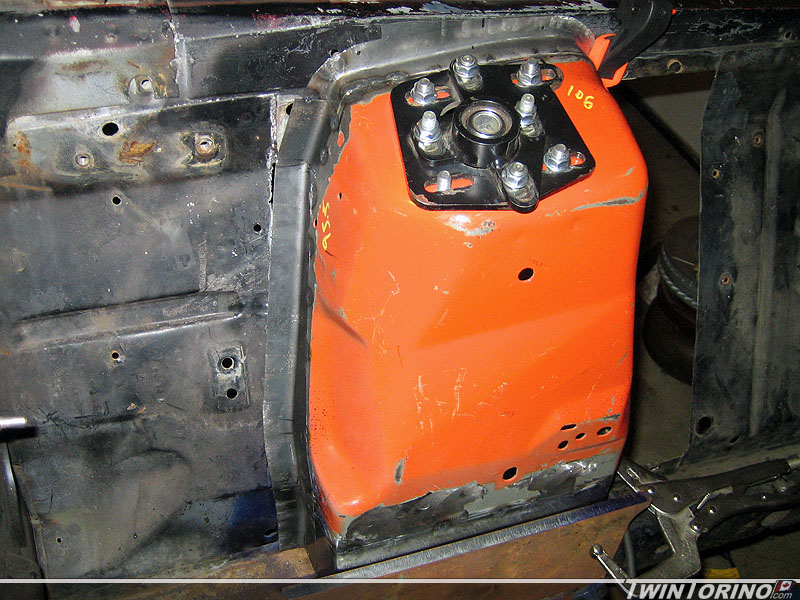
1/19/10: Finally have the drivers side tower completely welded and finished up and ready to weld in.. about time! Pass side is welded and should be finished up tomorrow night. Just need to blast everything and paint it to get rid of all the contrasting colors. I quickly splashed some black primer on one of them to keep me insired . Also have all of the close-outs done and ready to weld in too. Just need to make a jig to be able to plasma cut a k-member to fit and make it very easy to do more than one.
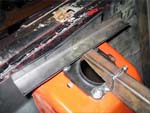
1/10/10: Making some more progress once again. Finished tacking in the rear side of the drivers side strut tower. Just need to make some small pieces to clean up the top of the strut tower and it will be time for final welding. Everything fit together much better than expected.
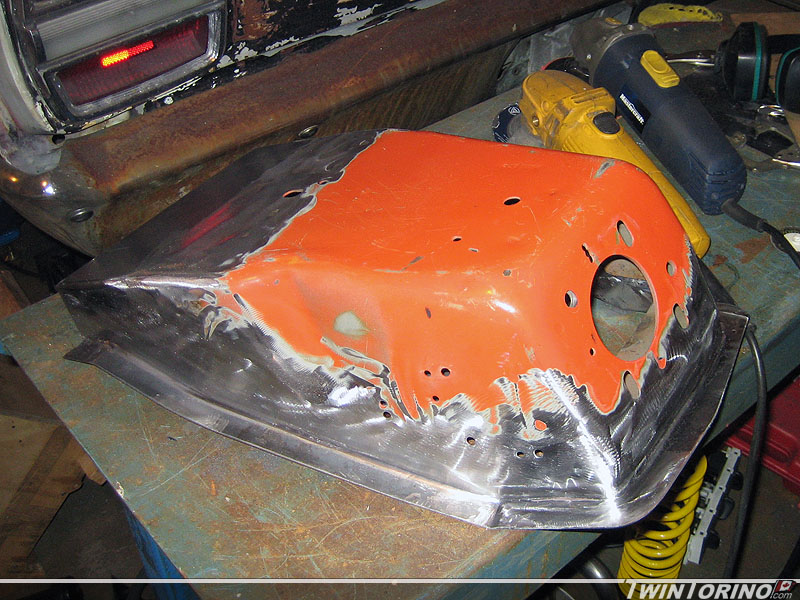
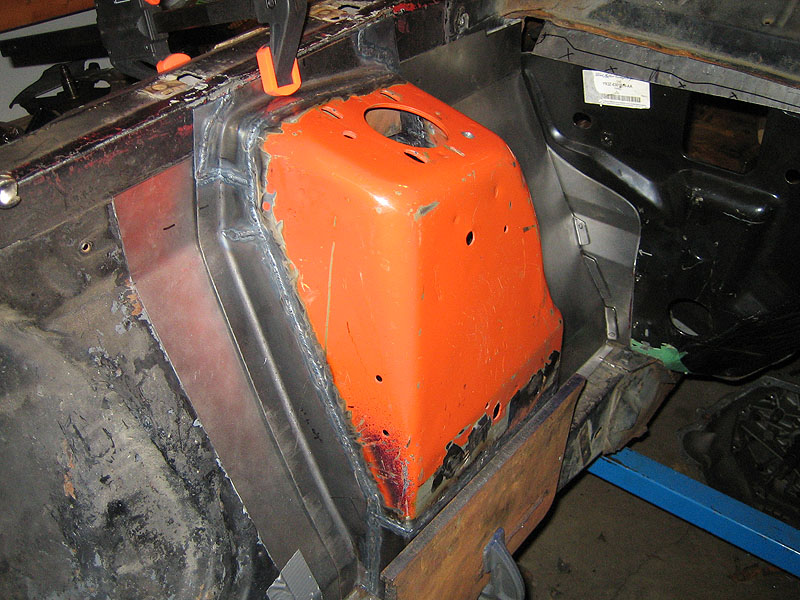
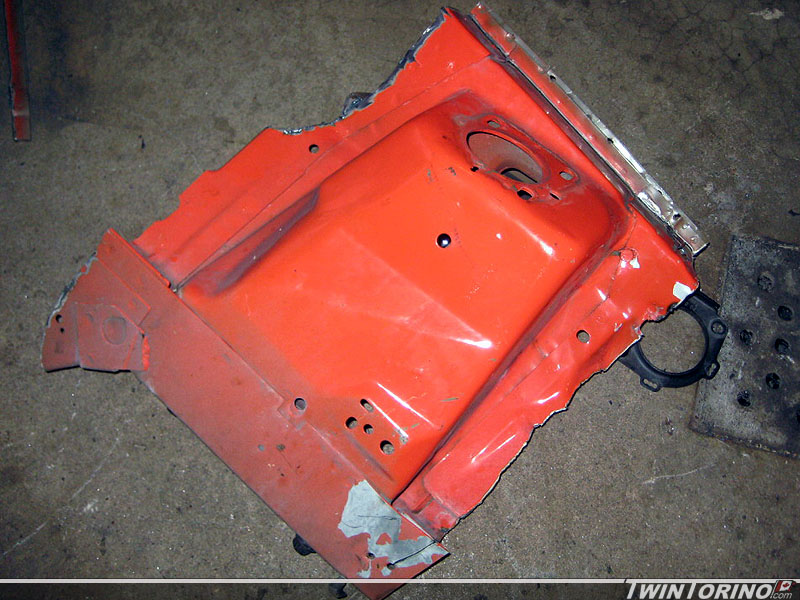
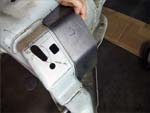
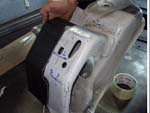
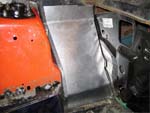
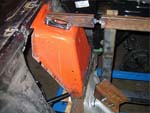
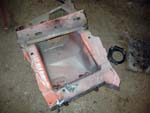
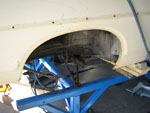
Made a close-out panel at the rear of the pass side strut tower. In order to clear the air dryer for the A/C and to to mate up with the new firewall, it was just easier to make this from scratch. Once this piece is done, the strut tower can be finished as well.
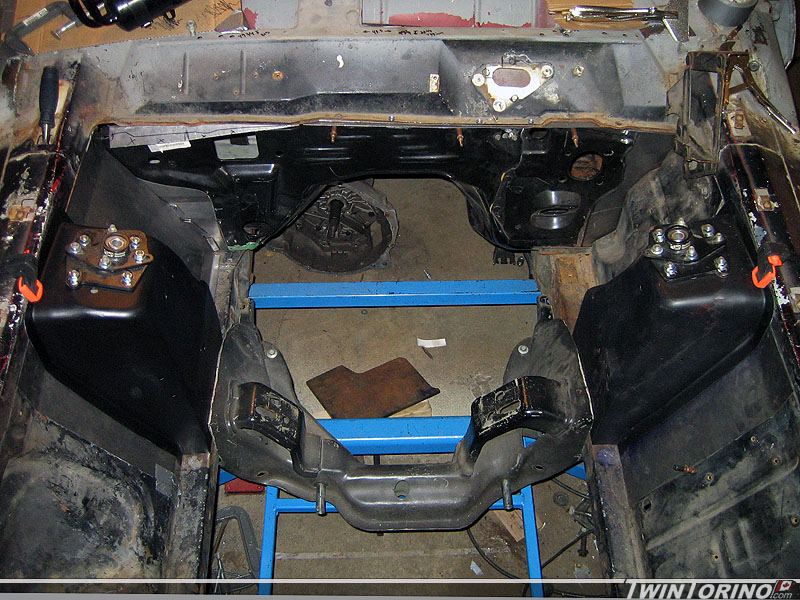
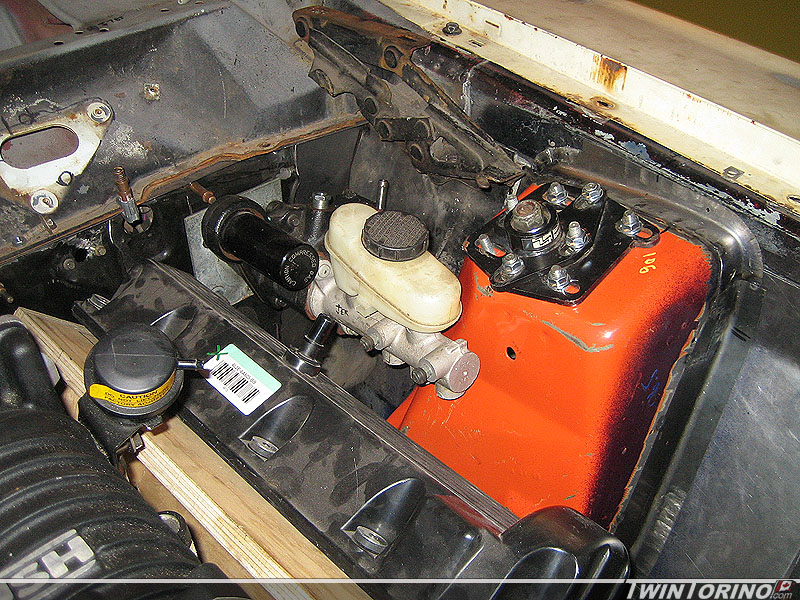
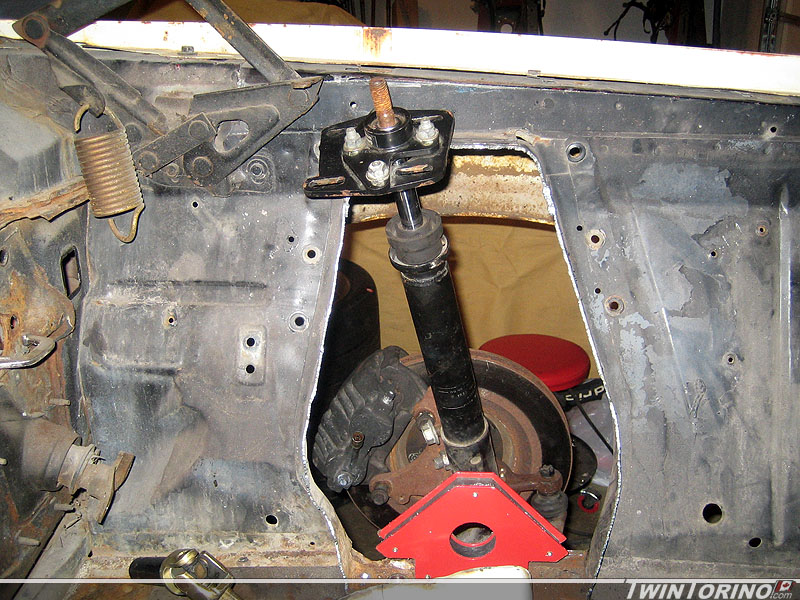
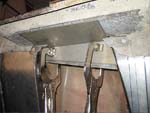
Decided to put everything together once again and check all the clearances one more time before we start welding parts to the car. The hydoboost unit and the hood hinges clear the new strut towers, so we can now proceed with them as in that location.
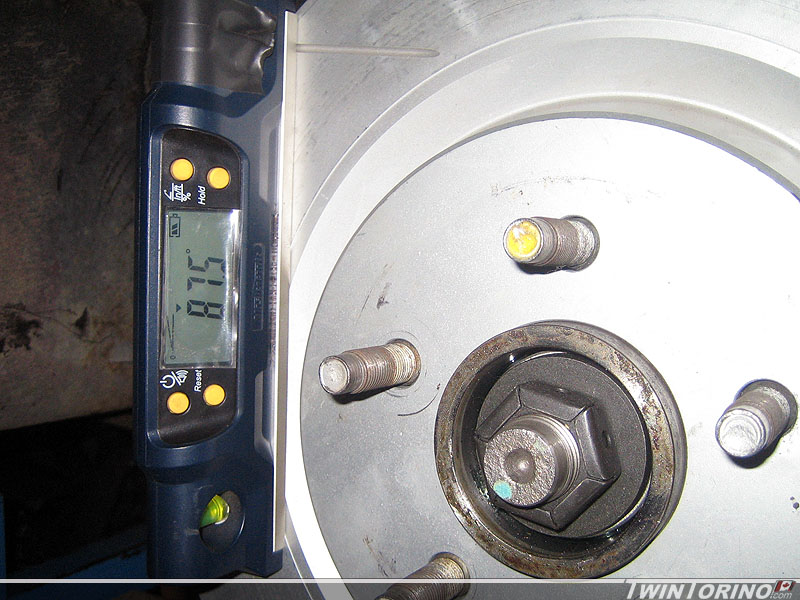
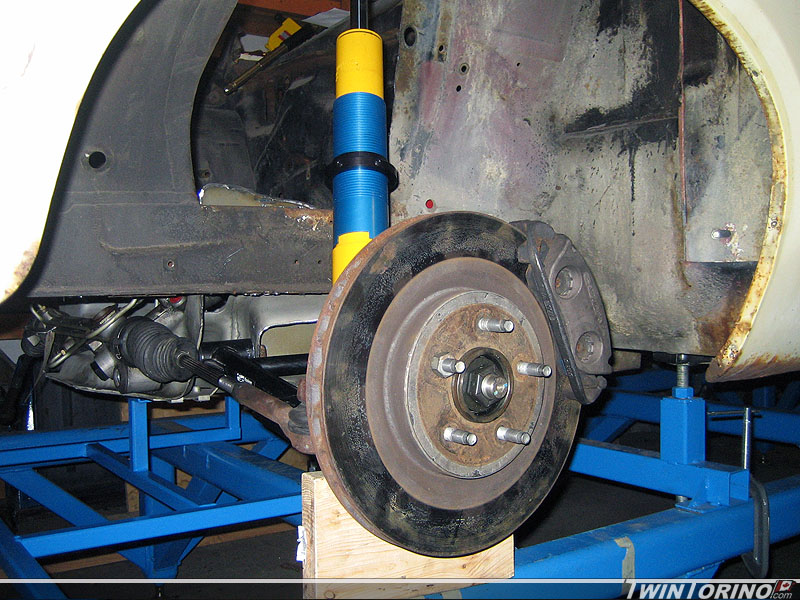
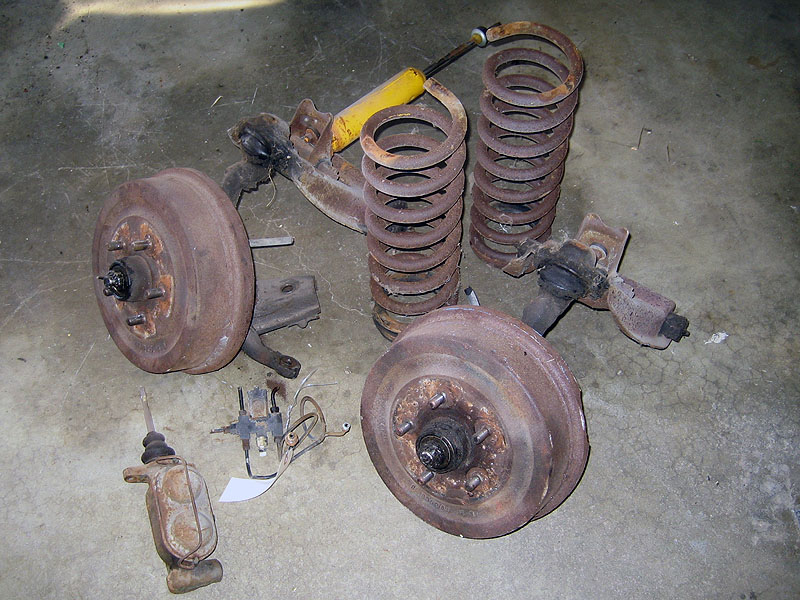
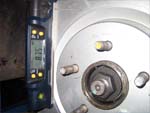
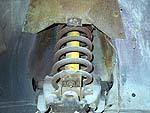
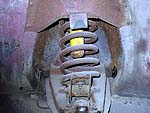
12/26/09: Managed to work on the car a bit over Christmas. Hoping to maybe even get the car back down on the ground soon enough. I got a Longacre caster/camber gauge for Christmas this year so it was time to put it to the test. It is a nice billet piece with lots of bubble levels on it. The only unknown parameter in the mix was the caster that needed to be set for the vehicle (as camber is relatively easy to measure with a digital level). Ford recommends 3.6-4.3 deg caster on the Mustang. We are setting it to approx a min of 4.5 and max of whatever the caster/camber plates allow. The larger number will mainly be used on the track. These numbers are generally agreed upon in the Mustang world, and lower recommended numbers are based on the fact that the Mustang was designed with the "average" vehicle owner in mind. The shock towers were simply slid forward until we saw the measurements we wanted. They are now fixed in place.
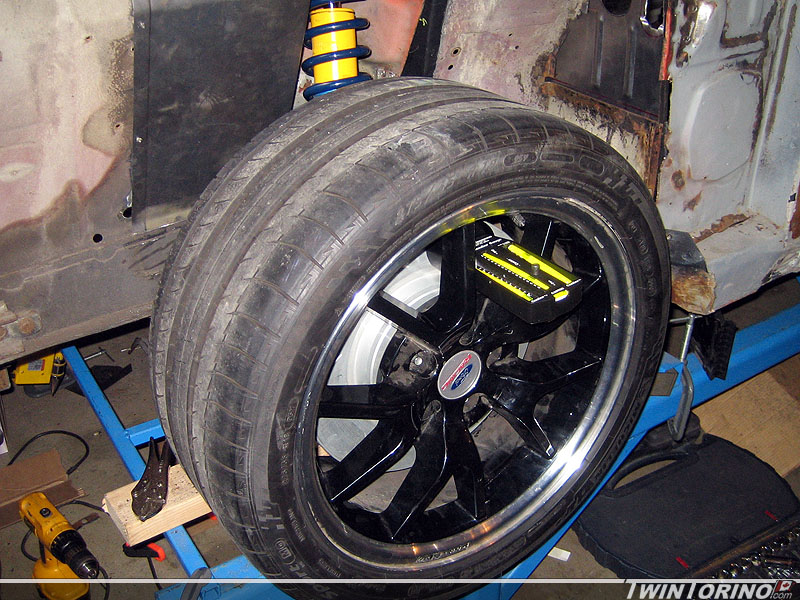
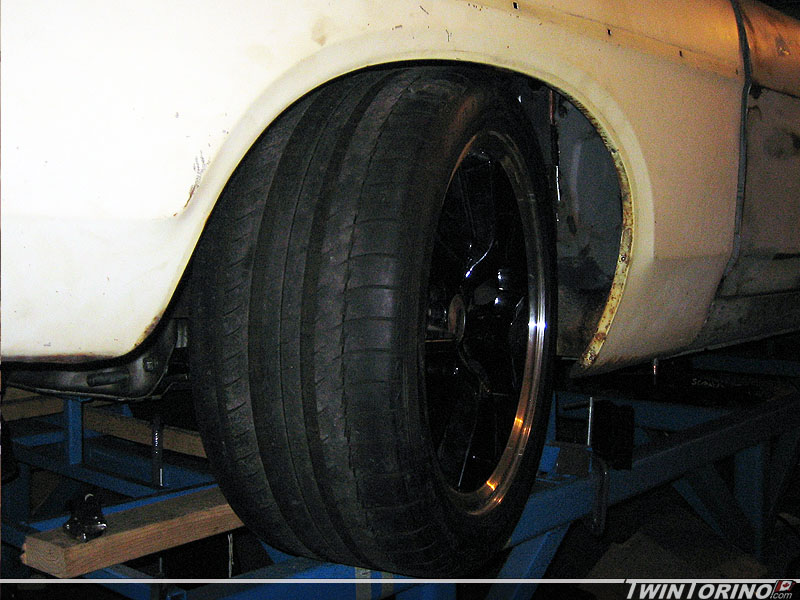
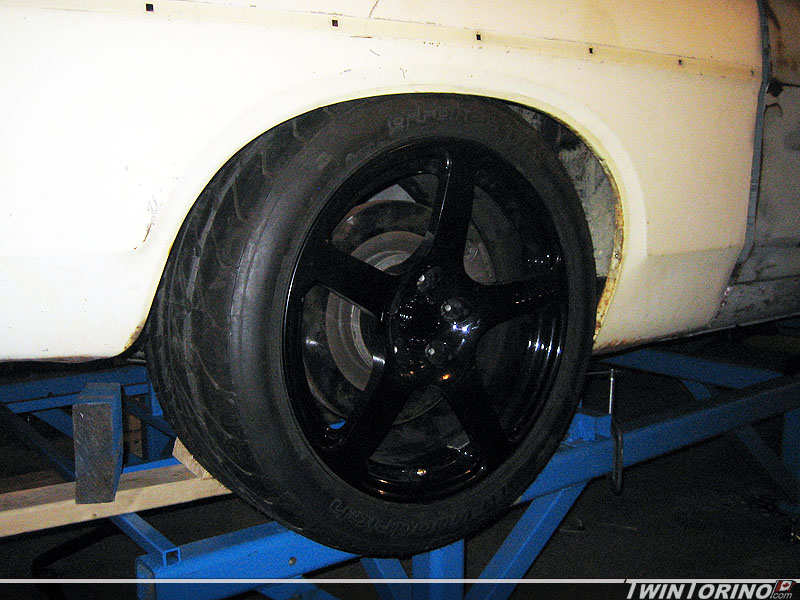
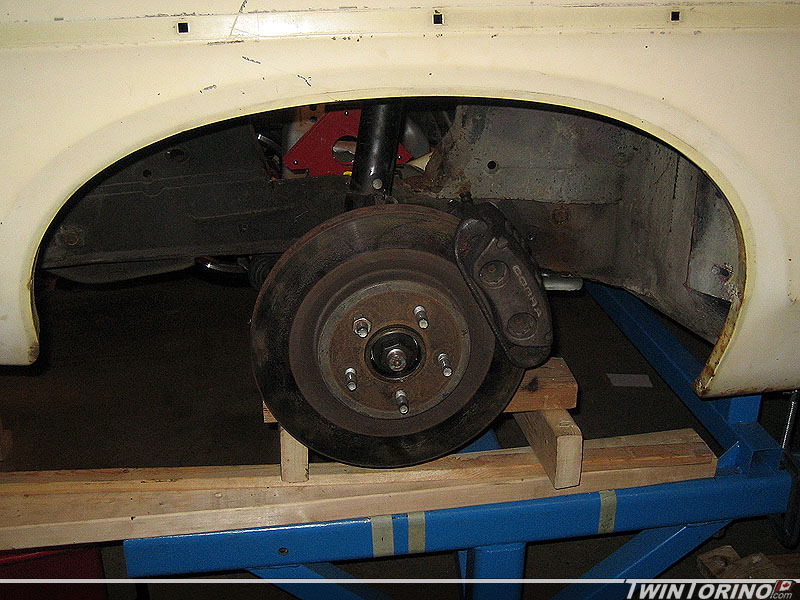
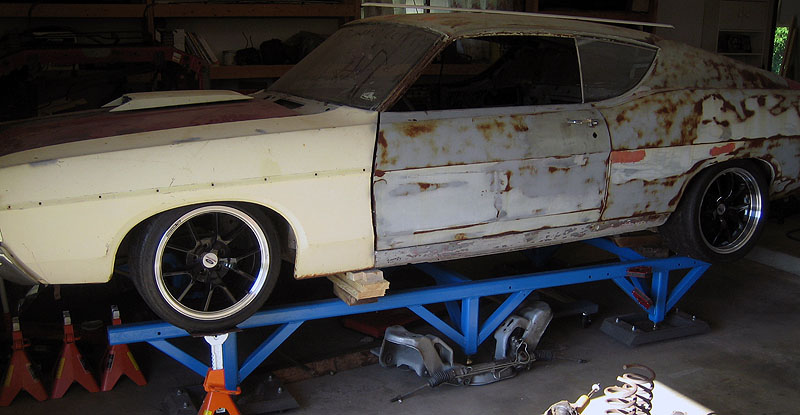
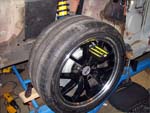
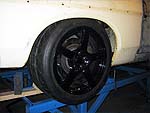
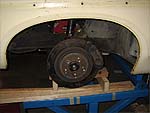
Also managed to find a barely used pair of 275/35R18 Michelin Pilot PS2 tires to try out on the car (same size/model as a newer Viper so they are not that hard to find). They were mounted up on the car and we ran through a clearance check and they fit perfectly. The hardest part about getting a tire to fit is while turning the tire when the front suspension is compressed, and they also need to clear the coil-over suspension.
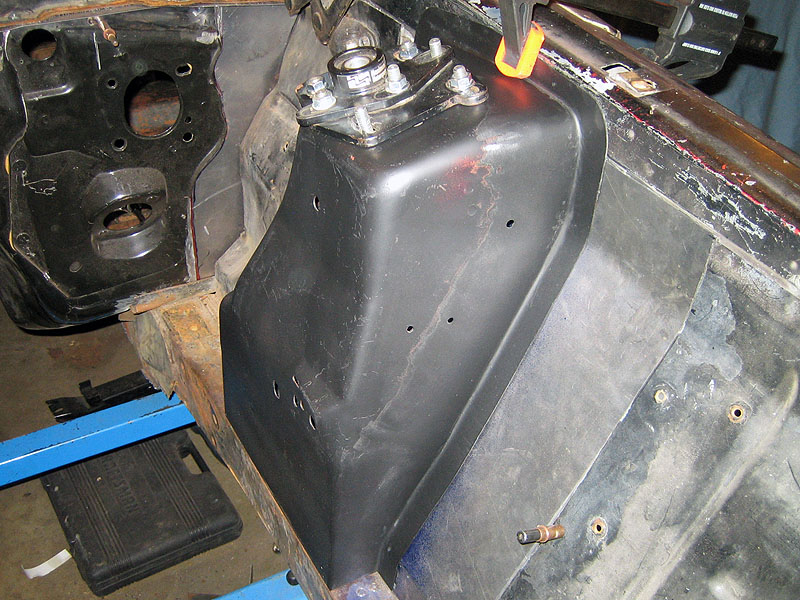
Also moving right along on the front strut towers. Have all of the pieces tacked together on the driver's side and everything fits great. Should be able to weld these in soon. Just need to add a piece in the top corners and they should look factory stamped.
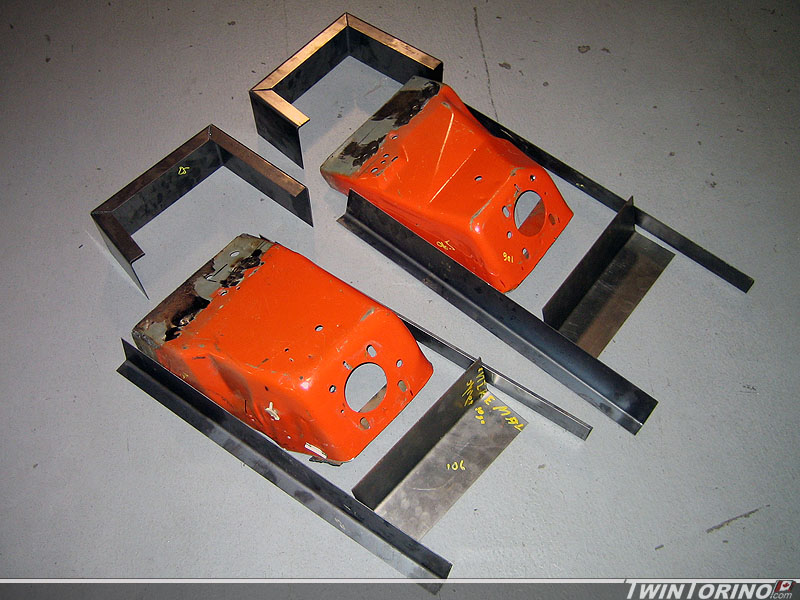
12/16/09: We dusted off the stretcher/ shrinker and formed the sides and top of the strut towers. Also cut the bottom piece to fit and trimmed the shock tower to mate with the bottom piece. They should look factory stamped by the time we are done with them. Also made the filler panel for the section that was cut of from the original shock towers. Just need to trim things to fit and we will be ready to weld. Finally there is light at the end of the tunnel.
Also got the pass side upper shock tower piece bent up. Stretcher shrinker combo works miracles with ease. Also got the drivers side upper piece tacked in, and worked on the front filler panel. Most things are almost ready to weld in.. but I ran out of Argon so I have to wait another couple of days to get the bottle filled.
12/6/09:We made up the filler pieces for the strut towers. 16 gauge sheetmetal is definitely not as easy to work with as 20 gauge. Hope to get everything in and fit up this week and ready to weld in next week. Actually feels like I am getting somewhere now. The only pain with making these up was that none of the angles were 90 deg and each face of the strut tower has a slight crown - looks the like the stretcher/shrinker is going to get a good workout.
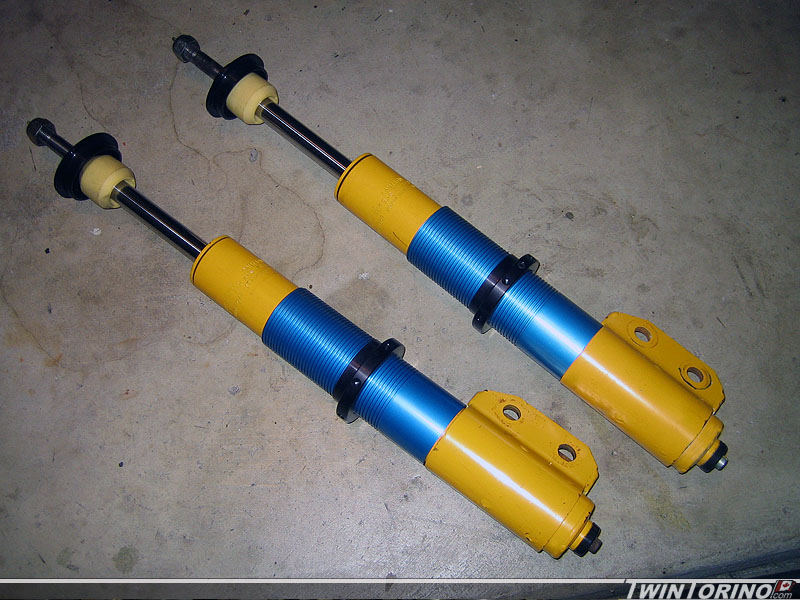
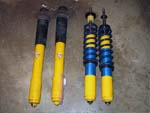
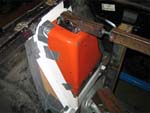
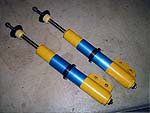
Finally found another set of Konis for the front of the car. They almost never come up used as they are not very common since they are double adjustables (likely because they retail for close to $1k for a pair). Since we can't afford that.. or even close we just have to wait to get them for 20% of that. Easy way to pick out a double adjustable Koni is to look for the screw for adjustment on the bottom which both sets have. Single adjustables (rebound only) only have have sdjustments on the top of the strut rod.
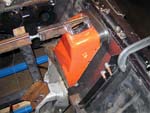
11/26/09: Got the point where we finalized the front strut mounts and achieved the desired caster and camber targets (took a lot more time than planned to manipulate everything to get it perfect). Now it is time to bridge the gap between the Mustang strut towers and the Torino. Went out and bought half a sheet of 16 gauge steel (same as the Mustang towers) and made up templates using cardboard. Just need to bend these up in steel, cut and weld into position.
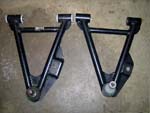
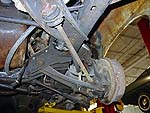
11/6/09: Had my first issue with Ebay.. thankfully it turned out OK in the end. I bought a set of Fox body tubular front control arms which I thought were made by Maximumum Motorsports (one of the highest quality Mustang tubular control arms you can buy). Got them in and they did not look right or fit right. Sitting 5 feet away they looked like the real deal. Turns out in the end they were knock-offs from another company. Once I convinced the seller they were not legit (he was not aware either), I got my money back and send them back. In the meantime I was able to convince someone to trade me straight up for the ones I had already. As you can see, they are much shorter which works out perfect. I now have lots of tire clearance and should be able to fit 275's up front which was the original goal (2004 Cobra used this size).
Unfortunately with the Fox control arms being used, this also means the upper strut mount needs to move inboard to be able to get the alignment settings right. This meant we needed to cut up the jig and make it adjustable using threaded rods and nuts.
The goal here is to be able to set the front wheels to 2-3° of neg camber for the track, and then adjust them back to 0.5° neg camber for the street. The caster is also being increased relative to stock. Looks like 275's will fit up front when using the 0.5° setting which is great news.
All that is needed to set things into position is to flip the camber plates upside down and swap side to side. This way they can be bolted to the jig. Next max the camber setting inboard and then take suspension measurements. Keep adjusting the fixture outboard until the max neg camber is achieved. After this, unbolt and put on shock towers. Lots more sheetmetal work ahead, but it should hopefully work out in the end. Turns out the inner surface of the shock towers is almost flush with the origional fram rail which make things easier fab wise.
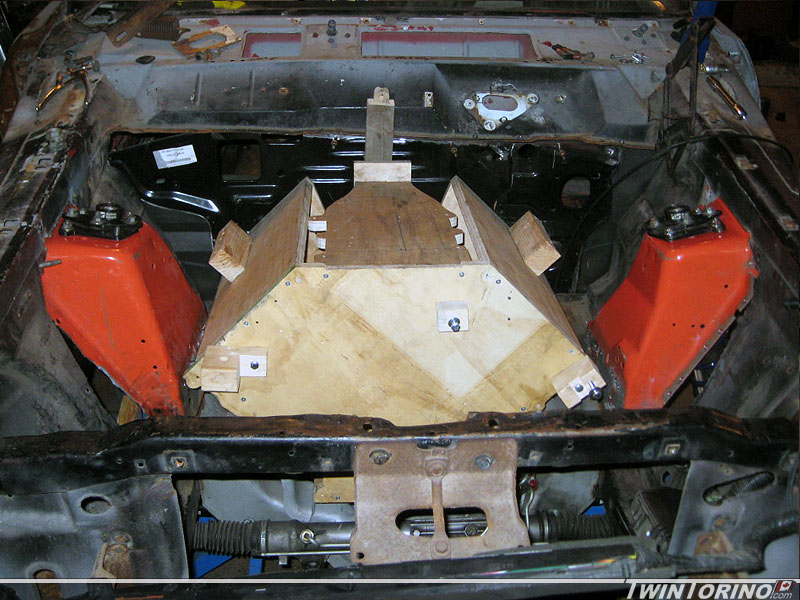
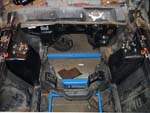
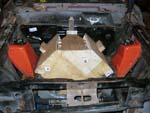
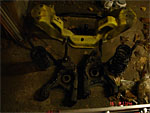
10/2/09:: Moved back to the suspension side of things. Making some good progress up front. The main thing with the suspension was making sure the upper strut mount point on the Torino is the same relative to the lower control arms points as the Mustang. This way the geometry is retained, and the strut travel is maintained for both jounce and rebound. We went back and forth on this one and figured since we have a Mustang front clip, we may as well put it to good use. We made up a jig using some extra material we had, and also used the stock strut retainer braces from the Mustang for positioning the towers. We used sockets as dowel pins to line the jig up with the motor mount plates. Worked like a charm. Once we got this in.. we realized we had some issues with front tire clearance as we new we would. The suspension needs to be adjusted down an inch relative to the body and things should work out great. This will also buy us some much needed hood clearance for the supercharger. Shock towers will look nice and clean by the time we are done with everything.
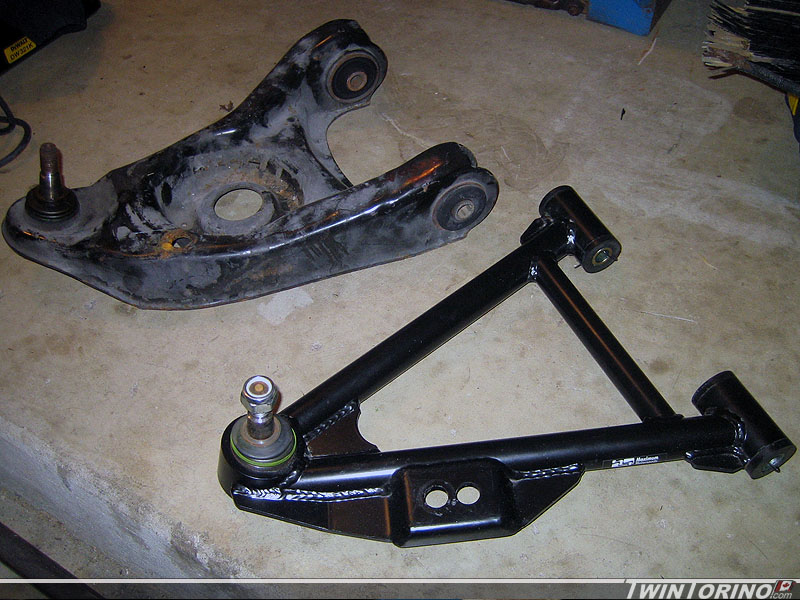
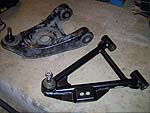
We decided to switch to shorter control arms to be able to fit larger tires up front (265's or 275's). This has been a pain because the fender lip is low and covers the top outside edge of the tire, and also the tire hits the coil-over spring on the inside. While the outer lip is fine if you chose to only drive straight - as soon as you turn the tires would scrap on the fender. Four options to get out of this one. 1) Accept a tire size of 245 or less. 2) Add flares to the sheetmetal 3) Move strut inboard via shorter control arms. 4) Bail out on the suspension package and try another one. 1 and 2 we were not willing to accept, and 4 was too expensive and we didn't want to have to work with a mystery suspension design. Turns out option 3 was easier than we thought as we can just use 79-93 Fox body Mustang tubular control arms which are .9" shorter.
We ended up finding a used set of Maximum Motorsports Fox body tubular control arms used online. These actually have a forward offset of .75" in addition (ball joint moves ahead, pivot points stay in the same place) meaning we could squeeze a bit more caster out of them. The only reason these work for us is because we can put the shock towers anywhere we want them and can achieve the camber we need. This would not be the case if you were to start with a 94-04 Mustang and add 79-93 control arms.
9/8/09: Cut the front strut towers out of the '04 Mustang (definitely not up there with the most fun activities to date). After they were out, we needed to drill out spot welds and cut off what we don't need to fit in the Torino. We also cut out the remaining pieces of the stock shock tower in the Torino. The last picture shows a quick mockup. Still need to trim off some material and determine where they have to go exactly. Very pleased with initial fitting - they actually look like they are supposed to be there. Believe it or not, the Torino and Mustang engine compartments are the exact same width (to an 1/8"), and the angle of the sheetmetal in the Torino in front of the strut tower exactly matches the Mustang so they should blend in nicely. The goal is to make it look like they were supposed to be there.
2/9/09: Made some more significant progress on the front suspension of the car. Koni dual adjustable struts came in (used of course) and also the Maximum Motorsports coil over conversion kit.
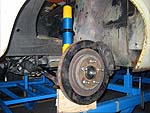
In order to get the suspension in place and get it to the right height, we needed to build a fixture that would work with our chassis jig. The k-member was used as reference and mounting points were chosen and located. Once this was built, it was placed on the vehicle so a tire and wheel could now be put into place. These are our track wheels/tires. They are Roush forged 18x10's. Lots of new clearance issues came up with this.. and we be datailed as the install continues.
1/30/09: Have found most of the front suspension components online in the past month or so (nearly new for discounted prices of course). Nice thing here is since we are running SN95 (1994-2004) Mustang based suspension - the sky is the limit with aftermarket parts.
Front suspension will consist of (parts are on the way or in hand now for one car):
- Maximum Motorsports front tubular lower control arms
- Koni dual adjustable (DA) front struts with adjustable rebound and compression damping
- Maximum Motorsports coil over kit
- Maximum Motorsports caster camber plates
- Stock Mustang front spindles/hubs
- Hypercoil springs - have not decided on rate yet.
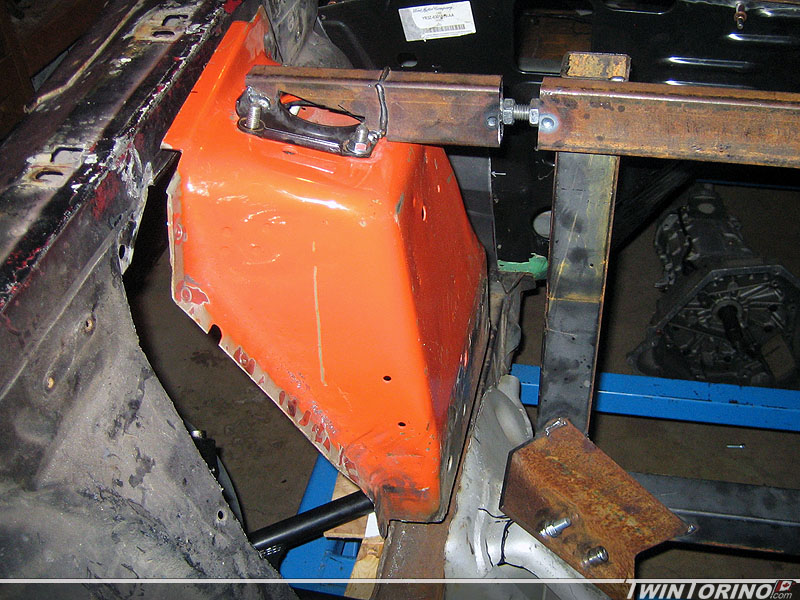
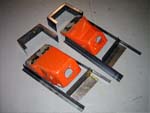
Since the strut rods are no longer needed, the brackets that house the bushings were removed. Custom brackets will be made up to stiffen the area once again and also provide mounts for the radiator, A/C condensor and ABS unit.
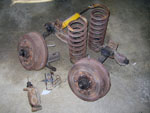
With the suspension almost in position, the stock control arms make contact with the frame. Tubular control arms correct this issue, although just barely. The goal here is to get the suspension in the exact same position as in a stock Mustang to keep the suspension geometry the same (easier said than done as we are finding out). Nearly new tubular control arms compared to the old ones. Since we are running coil overs, spring pockets are no longer needed. They are also lighter and much better looking.
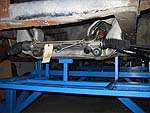
1/9/08: Started to mock up the front suspension by putting the control arms in place as well as the spindles, hubs, struts, caster/camber plates and brakes. The suspension is sitting approx where it will in the shock tower area. Next step is to finalize these points with a plumb bob to match the same points as a stock 2004 Mustang. Then it is time to build up costom strut towers. The struts shown are just for mockup. In the end the car will be running coil over struts with adjustable rebound and compression (Koni or Tokico). The caster camber plates will allow us to run 2-3° of camber at the track and then back to stock specs for the street. The only immediate problem is going to be with the hood hinges interfering.
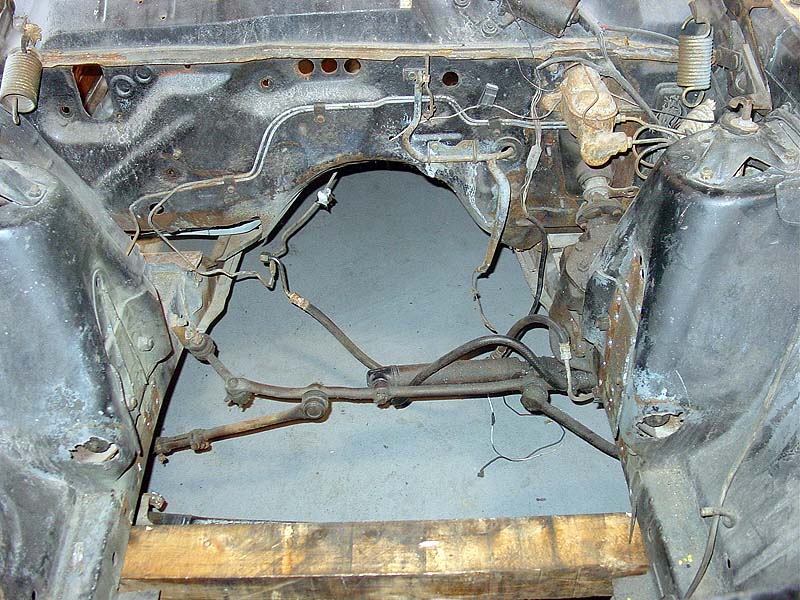
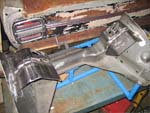
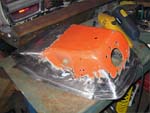
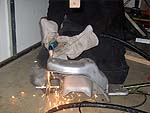
1/5/09: Finally getting down to business here. Let me first start by saying how great a tool a plasma cutter is!! This is by far one of the best and fastest tools I own. It makes cutting up cars a breeze. It was finally time for the shock towers to go away to make room for the new ones. Once there were out, the stock Mustang k-member was modified to allow it to bolt into the Torino. This took a little work, but it should look really nice once we get this in there for good. The steering rack was placed in position and will work perfect once in place which is another relief.
7/6/08 - Goodbye 1968 Technology
Finally time to get some work done on the car once again. Now
that the car is the the air on the chassis jig, all the base
suspension can be removed. The last thing this car will need
up front are disc brakes, so away they go. Now with the
suspension gone, the car can be mocked up with wheels - starting to
look much more aggressive with the 265's and 315's.

12/15/07 - 1968 meets Y2K
We managed to find a Mustang
front clip through a friend of a friend. This is a major part
of getting the front suspension set up, and also serves as a build
buck to determine where everything goes and how to get it to fit in
the Torino (should be interesting). Surprisingly enough the
engine compartments are the same width to within a 1/4 inch.
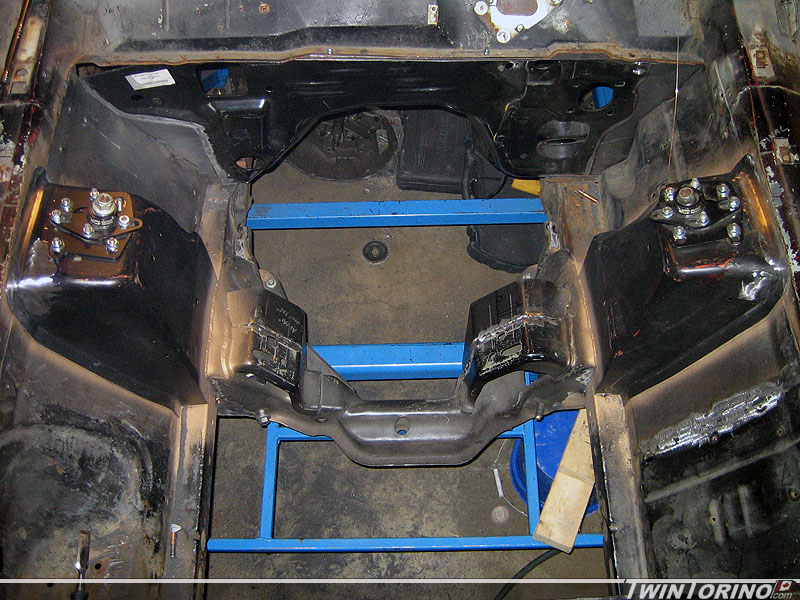
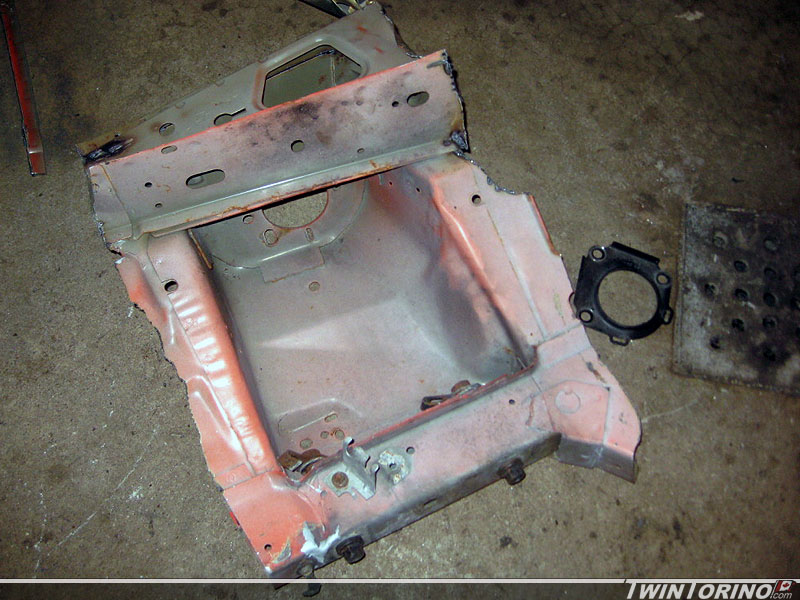
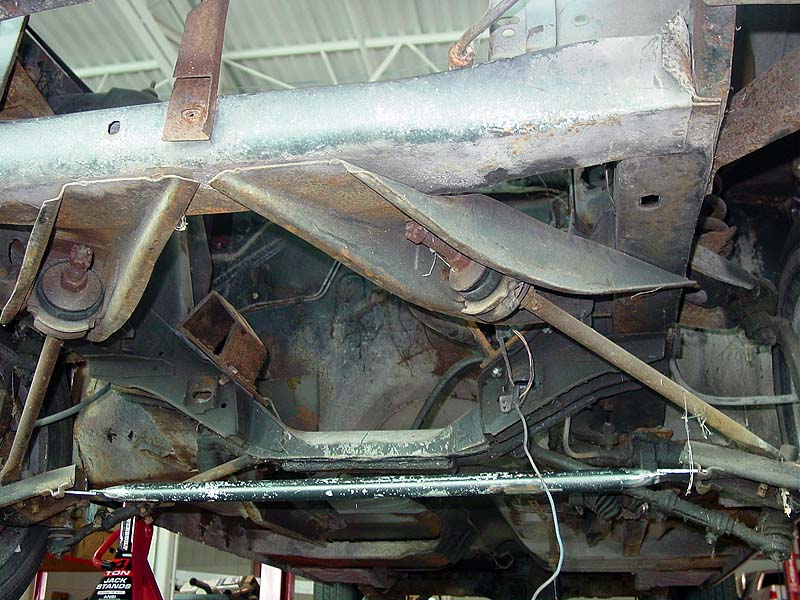
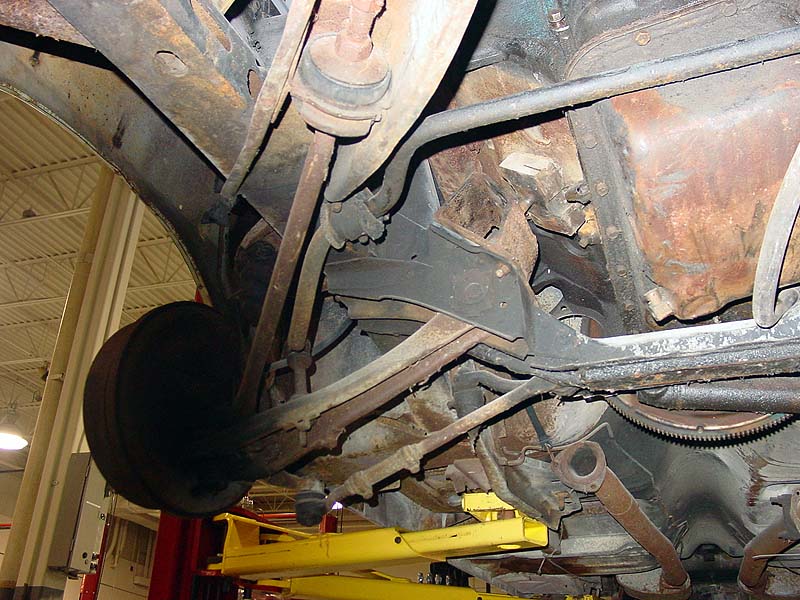
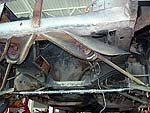
9/3/07 - Front cross member be gone..
In order to get
the new suspension in the front end of the car - the old setup had to
be removed. As you can see, the engine
cross member was completely removed. This will also allow us to
fit up the Cobra cradle assembly for the new suspension and have the
stock in place until we are ready to transition to the new setup.
The only problem we faced is we had to be able to move the vehicle
around and on and off our make shift chassis plate. In the end
we welded a hollow tube to brackets the bolted to the caster rods,
then cut the lower control arms in two. This ties the control
arms together, but makes the car very difficult to move around - but
at least is allows the suspension to be in place.

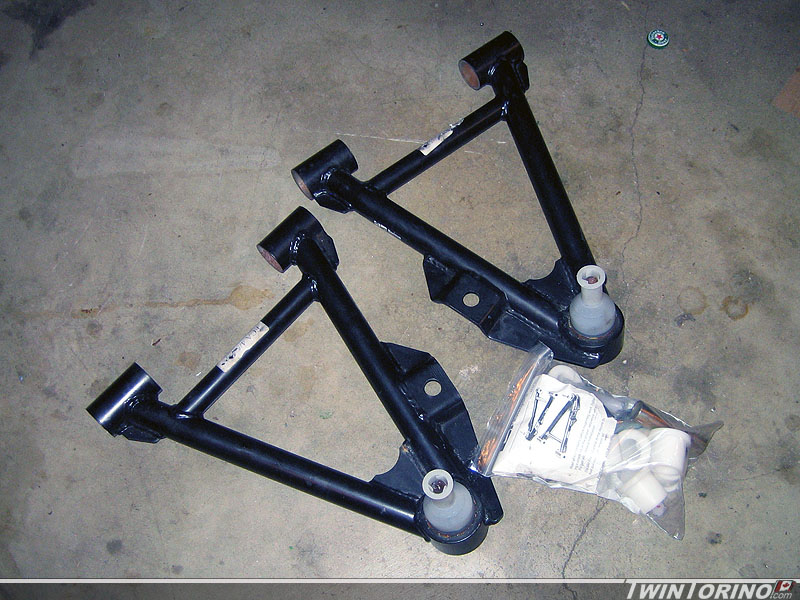
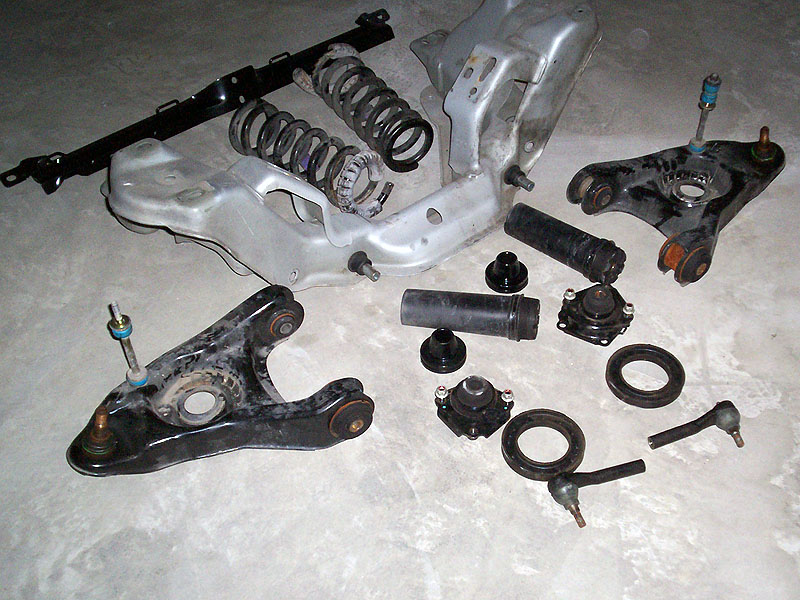
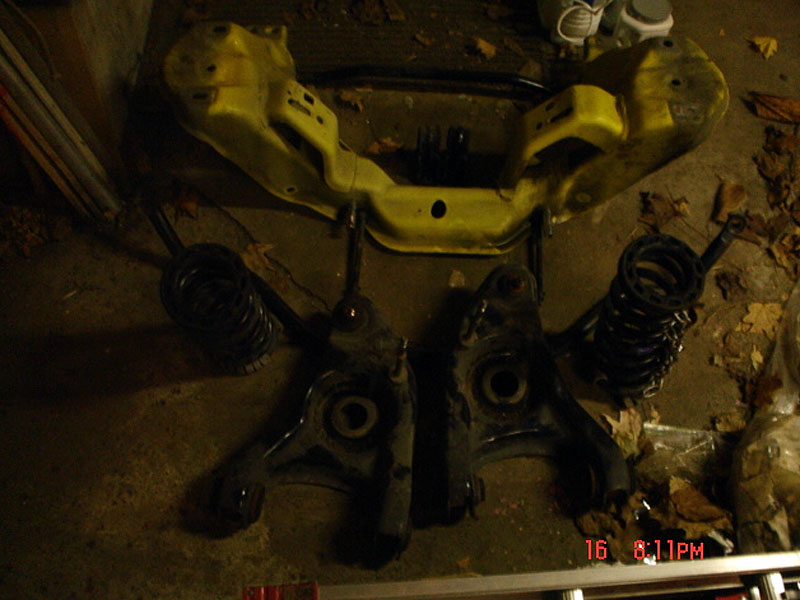
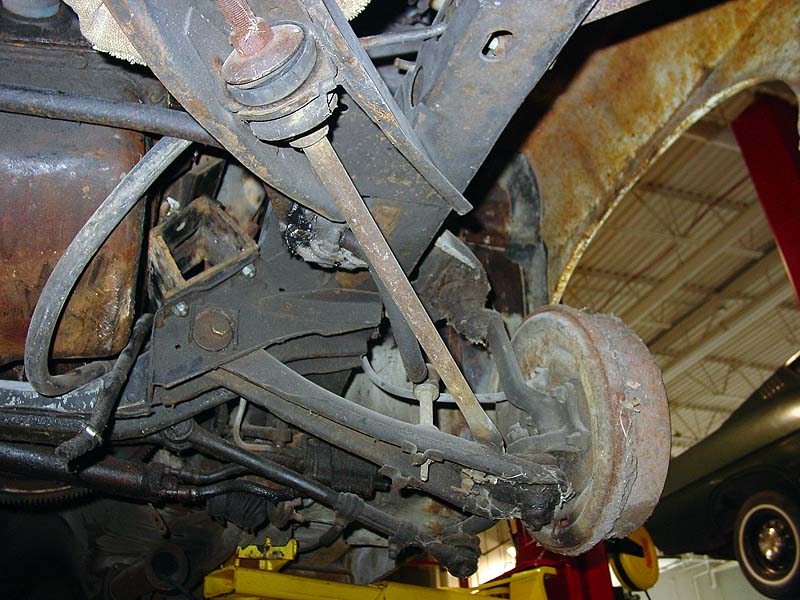
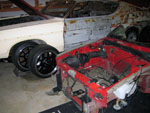
 A complete 2004 Cobra front cradle has been sourced and purchased
for the Texas Torino as well. This assembly came complete with
2004 Cobra K Member, control arms, sway bar and lots of misc.
hardware.

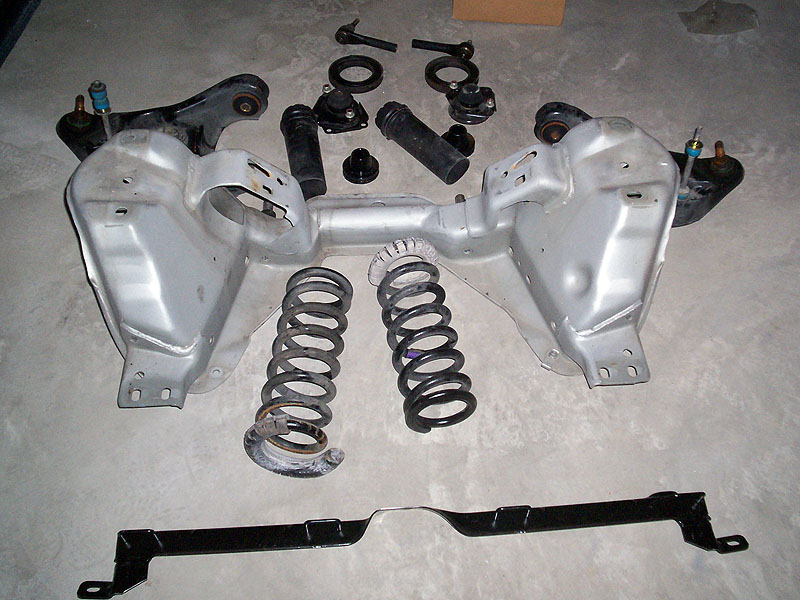
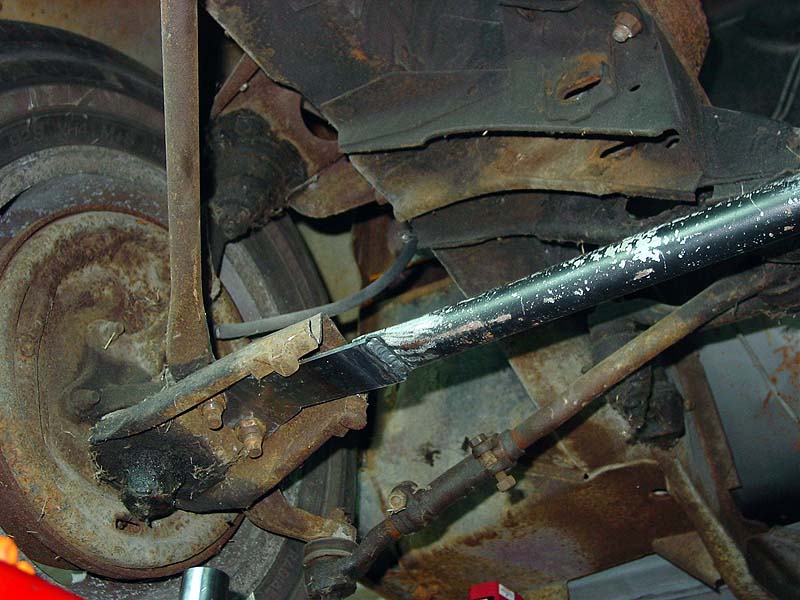
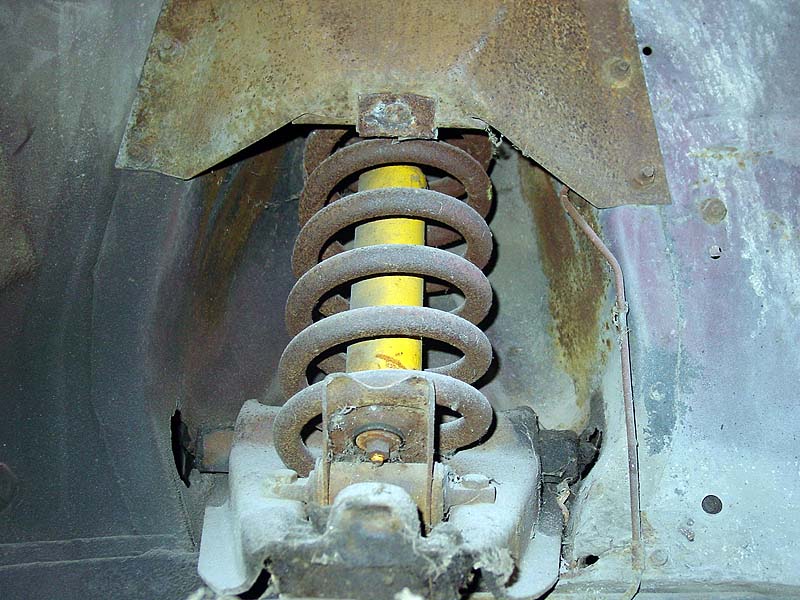
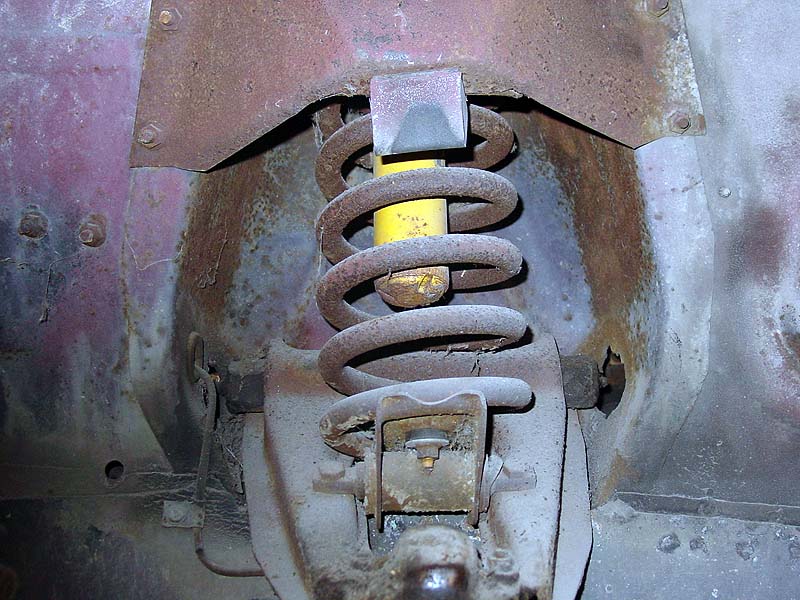
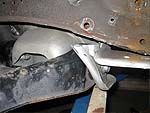
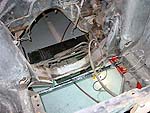
This is where the front suspension started out. Simple base
upper/lower control arm setup with caster rods. This setup is
similar to the Mustang. As you can see, the system was well
weathered. Otherwise the front cradle is in great shape and will
not take much to bring back to new.

|